Today I’m going to show you how to make a sign. These mini signs are adorable! They make great gifts, fun home decor to fill in small spaces, and they’re great sellers at craft shows, too. Best of all… they’re quick and easy! Don’t miss the video below where you can actually see the whole process.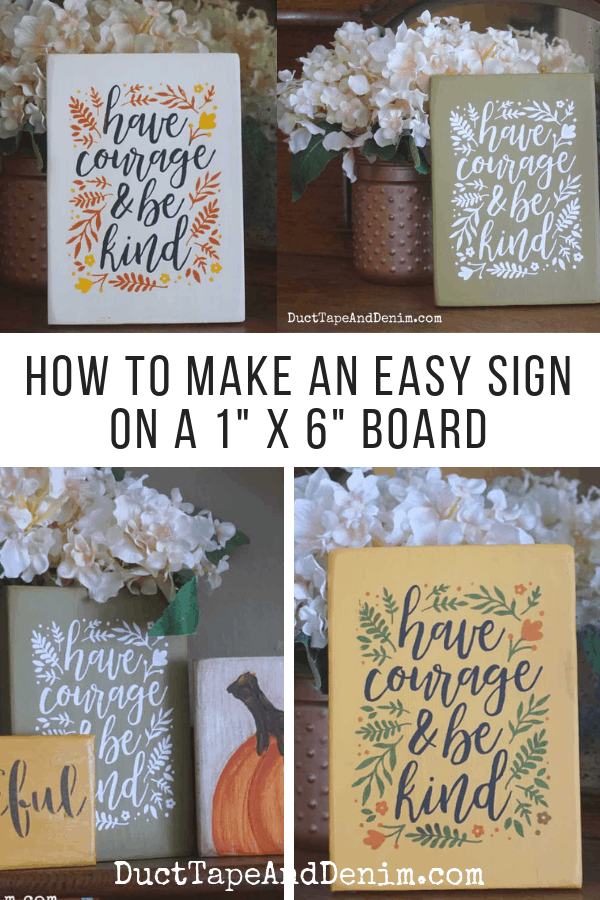
This post contains affiliate links. You won’t pay any more when you use these but I will earn a small commission on any purchases you make after clicking on them and I greatly appreciate it. Thanks for helping support my little blog!!!
{{{ Sign up for our email newsletter and get ALL my future projects sent straight to your inbox! }}}
How to Make a Sign – Mini Edition
Supplies needed:
- 1″ x 6″ board
- orbital sander OR sandpaper
- chalk paint (leftover from other projects)
- varnish
- Have Courage and Be Kind Transfer
- chalk paste
- squeegee
- old cake pan (optional)
- alcohol wipes (for clean up)
{{{See a complete list of what’s in my tool box and supply cabinet.}}}
First, prepare your surface. For this project we used plain 1″ x 6″ boards from our local hardware store. Bikeman cut them into 7″ lengths and sanded them for me.
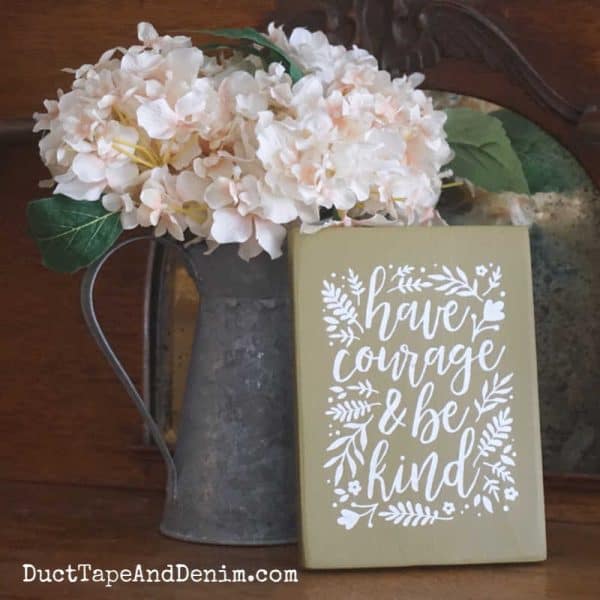
I wiped them off with a damp cloth to get the last of the sawdust off then painted them with leftover chalk paint. If you want to know exact colors used in these photos: the green is Holy Guacamole from Dixie Belle, white is Everlasting by DecoArt, and the yellow gold is Inheritance also by DecoArt.
We had quite the assembly line going for these mini signs! Bikeman cut two 8′ 1″x6″ boards (I forgot to count how many signs that made.) and sanded them. Then I painted all of them, let them dry (My entire dining room table and kitchen counter was covered in drying boards!), and varnished them.
When they were finally COMPLETELY dry, I stacked them and started the transfer process. If you missed it before, here’s a link to my basic chalk past transfer tutorial.
You can also see how to use the chalk transfer in this video:
And now for the finished product!
This mini sign is the most basic and easiest sign to make. I just used one color of chalk paste — Chalkology Paste, bright white. And that sign literally takes MINUTES to make!
If you want to get a little more creative, you can do each detail in a different color.
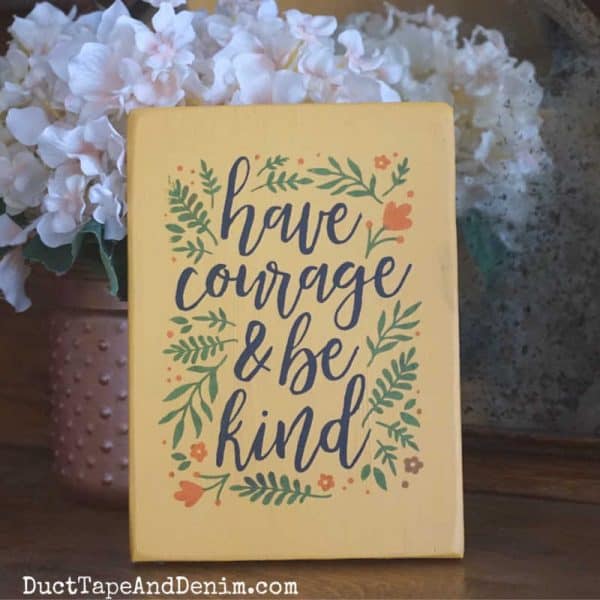
This technique does require a little more skill and speed. As you can see from the photo below I wasn’t careful with my colors and had some show up where it shouldn’t have. That didn’t really bother me. I like little “mistakes” like this.

And here’s a whole set of mini signs that I made for my fall shows. The Have Courage and Be Kind signs were the most popular and I sold out of them!

This next version used the same chalk transfer but a different technique. You can find my candy corn ombre tutorial HERE.

If you enjoyed this post, you might also like these:
- How to Stencil Grateful and Thankful Signs
- How to Make a Vintage Style Home Sweet Home Sign
- 21 Easy Fall Signs to Make Yourself
- 10 Gorgeous Ways to Make Your Own Farmhouse Signs
- The Cheater Method to Making Signs
- An Easy Way to Make Your Own Sign with Words (Super Easy!!!)
- How to Make Halloween Signs
Thanks for reading! I hope this project inspired you to make some signs. Leave a comment and let me know if you do.
‘Til the next project,
[…] How to Make a Sign from a 1″ x 6″ Board […]