Today I’m sharing some of my favorite tips for jewelry cabinet makeovers. If you follow my blog or any of my social media accounts you know that jewelry cabinets are my favorite thing to makeover. I find these all the time at thrift stores. Unfortunately, in my area, thrift store prices are getting higher. I think they’re onto the fact that we’re buying, restoring, and reselling.
The most I’ll pay for a jewelry cabinet is $10. I’ve paid $9.99 for a few of the big cabinets with doors and drawers that are in good condition. But $5.99 to $6.99 is a more common price.
I don’t pay as much for jewelry boxes. I easily find them for $2.99 to $5.99.
That $10 limit has made shopping easier for me. If I find one that’s over that I just remind myself that there are lots more out there and I’ll eventually find one in my price range.
This post contains affiliate links. You won’t pay any more when you use these but I will earn a small commission on any purchases you make after clicking on them and I greatly appreciate it. Thanks for helping support my little blog!!!
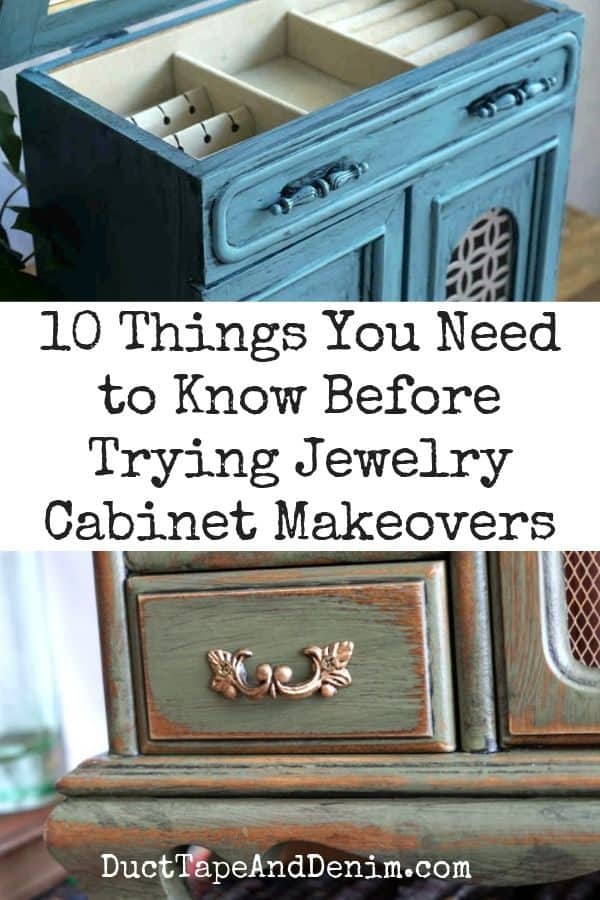
Tips for Jewelry Cabinet Makeovers
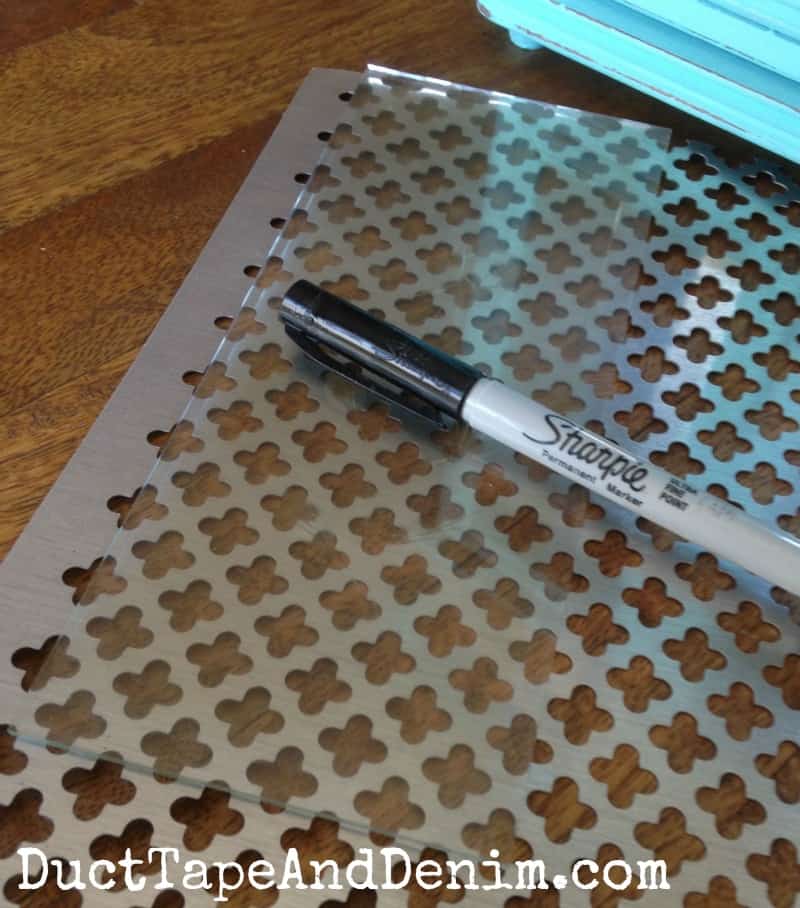
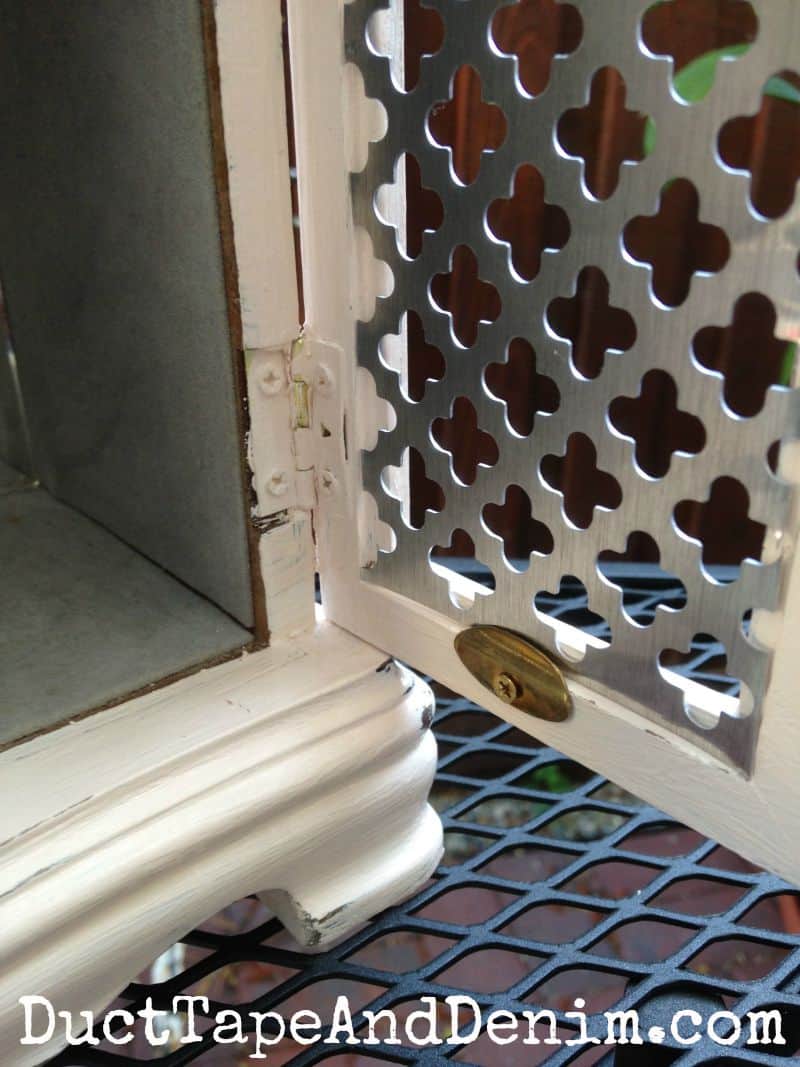
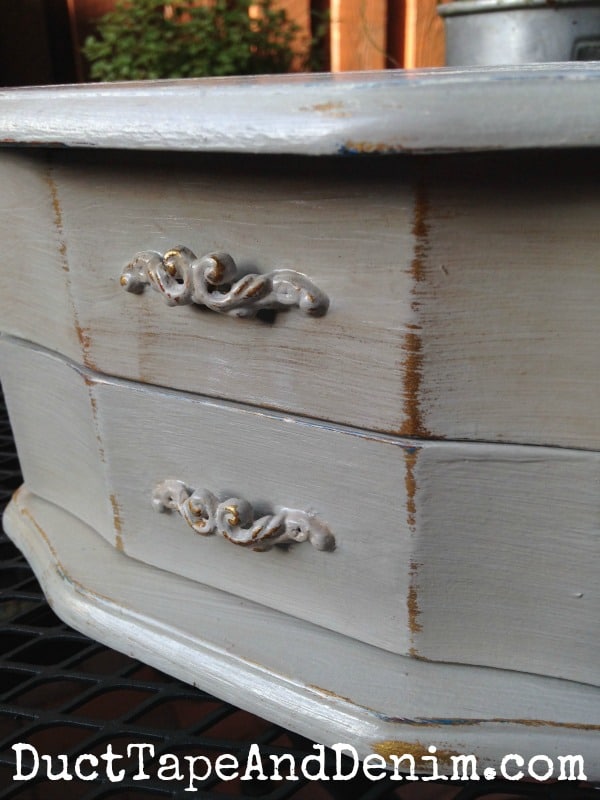
1. Keep glass to trace. I usually remove the glass from the cabinet doors. The first few I made I threw away the glass as soon as I took it out. But then I learned that if I traced the glass before cutting the wire or sheet metal I would get a perfect fit each time.
If you’re using metal with a pattern like in the photo below make sure the pattern matches on each side (if you have two doors). You may want to mark the top right sides.
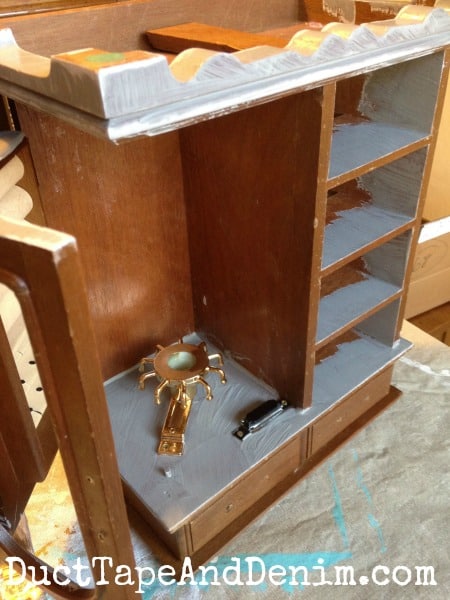
2. Start painting upside down. This is something I didn’t do when I first starting painting. I would get to the end of my project and realize that I completely missed spots just because I couldn’t see them when I was looking at them from the top. I don’t think I’ve missed a spot on any project since I started painting with the piece upside down!
3. Chalk-type paint. I’ve used lots of different brands of paint in my projects and honestly, all of the chalk-type paints work great. So far I’ve only run across one that I didn’t like and that might be because it was old. I love the thick texture and coverage that these paints give. And the best part is, no sanding!
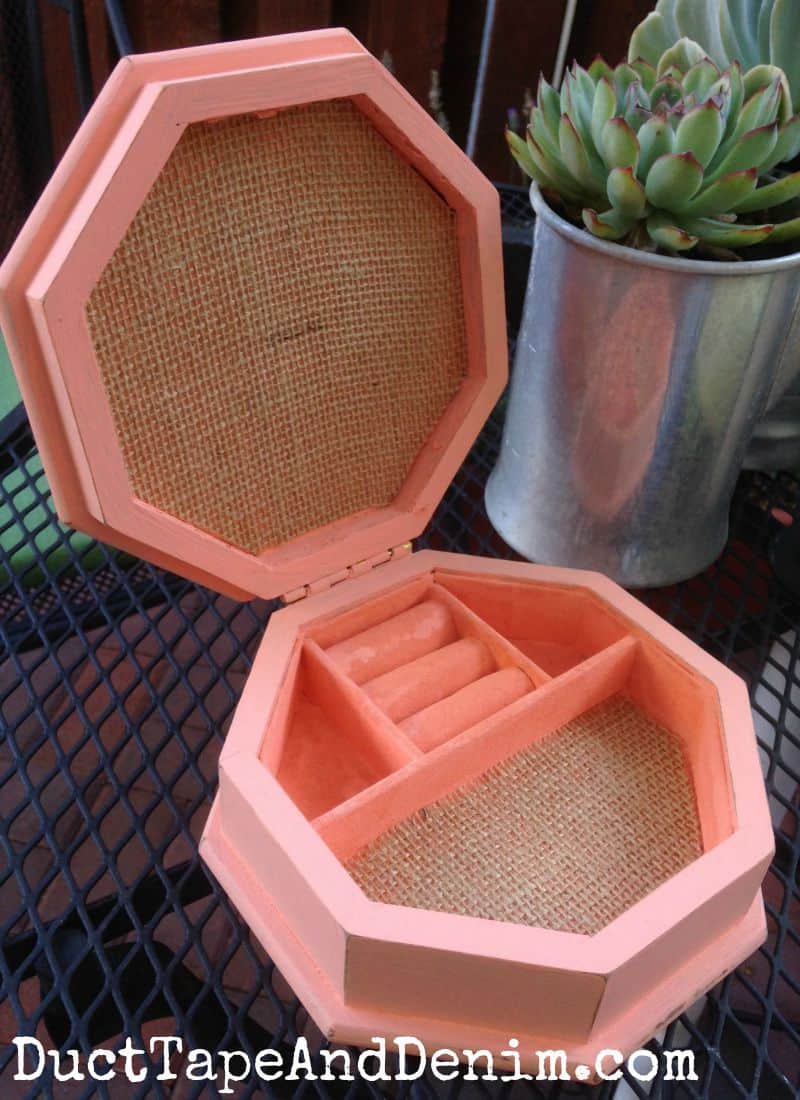
3. Paint over stained flannel inside. I once passed on jewelry cabinets and boxes with stains inside. But not anymore! I have a few tricks to covering the insides now. This little jewelry box below shows how I covered the stained flannel inside with paint and burlap.
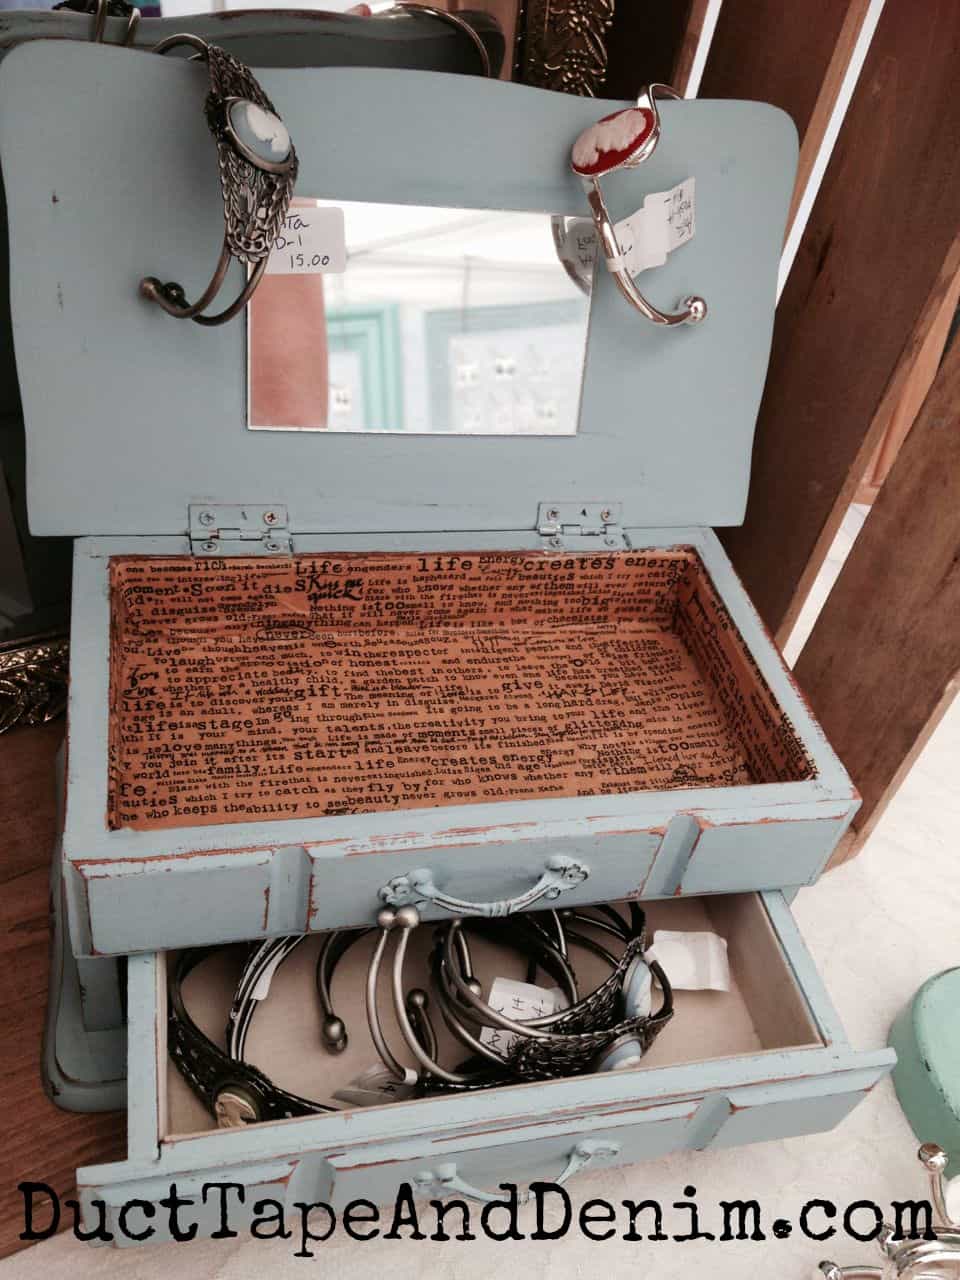
5. Glue leftover scrapbook papers over stained fabric inside. Like most crafters, I have TONS of decorative papers in my studio. This jewelry cabinet makeover shows how I used some of those papers to cover dirty fabric.

6. Glue tissue paper over stained fabric inside. This patterned tissue paper was really easy to decoupage over stains.
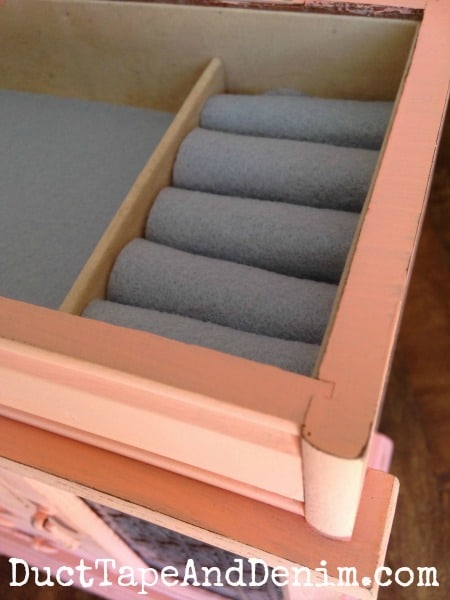
7. Glue felt over stained fabric inside. I cut the felt and glued it over stained areas in this large jewelry cabinet.
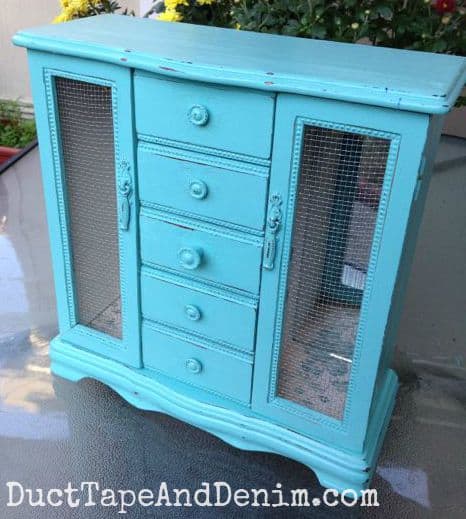
8. Replace the glass. As I mentioned above, I usually remove the glass in the doors. Most of the time they’re fake stained glass or etched with an out-of-date pattern. I like using these patterned metal sheets from Amazon, hardware cloth, or chicken wire.
9. Paint over hardware if it’s too hard to remove. However, don’t use too much paint or varnish on the hinges or the doors won’t close.
10. Mix and match drawer handles. If you don’t have enough of one style mix them up as I did on this jewelry cabinet makeover.

More Thrift Store Makeovers
If you enjoyed this post, you might also like these:
In conclusion, I hope you enjoyed my tips for jewelry cabinet makeovers. Leave a comment and let me know if you’ve painted a jewelry cabinet. I’d love to see your finished project!
‘Til the next project,
Ann @ Duct Tape and Denim
Pinterest | Instagram | Facebook | Twitter | Etsy | YouTube


Pattie Childress says
Thank you for your wonderful tips . A very nice gift!!
Sherry says
I love doing these too. I’ve had really good luck mixing Rit Fabric dye and applying it to the old jewelry box linings with a small spray bottle. If you choose a darker color than the original, most look like new again. Face toward the sunshine outside to let dry or near a heater inside. Takes several hours to dry completely. Do this before you begin to paint the wood, of course.
ducttapeanddenim says
Oooooooo, thanks for sharing that idea, Sherry! I’ll have to try that one.
Sherry says
Another item that helps in working with jewelry boxes is a lazy susan. I recently found a large one at a garage sale for only $3. I can set the box on it and turn it as I paint so I don’t have to touch wet paint to turn the box around.
I also recently got a small cordless screwdriver (brand name Hammerhead available at Walmart for just over $20) that allows me to screw the tiny screws one-handed. I simply twist a portion of the screwdriver handle the direction I want the screw to go with two fingers as I hold the device with my hand. It has a light that shines when you twist. I LOVE how easy it is to use and it is gentle enough not to strip out the tiny holes.
I have been using burlap in some of my boxes to replace the old glass. It works great and gives a place to hook earrings should you wish to do so. Black window screen also works well. Redoing these boxes is so much fun! Thank you for sharing yours.
ducttapeanddenim says
Great tips, Sherry! I’m going to look for that screwdriver!
Cheryl says
Sherry. Any instructions on how to use the fit dye for the velvet inside? I’m having a hard time figuring out how I. Going to dothis
ducttapeanddenim says
I haven’t tried that yet. If I do in the future I’ll write another blog post about it.
Carol says
I love jewelry box makeovers. I repurpose old spice cabinets, medicine cabinets and cigar boxes too. For the insides it’s so simple to replace or cover them. I’ve had wonderful luck with wide decorative ribbon I get marked down after holidays. It’s very beautiful and rich looking. I also have done wire bead work in place of the glass. Ty your article was great. How do you price your boxes?
ducttapeanddenim says
ooooooo….. those are some GREAT ideas! I actually price my cabinets and boxes pretty low compared to most I’ve seen. I figure that I mainly do it for blog content and since I don’t have much room for storage I like to keep them moving so I don’t have to store a lot. They’re usually $25-$40. Depends on the size, additions I’ve made, and where I’m selling.
Therese says
Thank you for sharing your ideas. will am going to try to sart one tomorrow. some great ideas. Thanks ladies. ????
ducttapeanddenim says
I’d love to see how it turns out!
Janice says
Thanks for the great tips. Do you have a post showing how to replace the top of a jewelry cabinet? The mid-size kind that have the mirror on the inside. I’m trying to go from a large floor type to one that will sit on my dresser. Gotta lot of jewelry I’m gonna have to get rid of 🙂
ducttapeanddenim says
No, I’ve never replaced the top of a jewelry cabinet. I’ll have to try that sometime.
Denise says
Why are you painting these jewelry armoires? I have one that I love, but painting it never crossed my mind. Why would I? It’s in mint condition. Or am I being an ol’ dud?
ducttapeanddenim says
Hi, Denise, Many of the jewelry cabinets that I find are in bad shape – scratches, stains, missing handles, or stains. Some are just outdated. By all means… if you have one that you already love, don’t do anything to it! You’re not being an ol’ dud!
Thanks for reading my blog anyway!
Marilyn says
Thank you for sending your useful hints and different ideas As Im aging Im finding that your letters are getting harder to read Is their a chance that letters could be made a bit bolder As Im typing this I find that this is much easier to read Thanking you in advance Merry Xmas too all
ducttapeanddenim says
That’s something I’m going to change on our next update. Thanks for your input.
Kathy A says
Loved everyone’s ideas. I have 2 boxes in my stash and hope to work on them this winter (Winter in Maine is TOO long!) One has a stained glass panel with pale pink flowers; I think I will leave it be and paint the box a blush color!
ducttapeanddenim says
Great idea… I’d love to see how it turns out.
Kris Lee says
Jus found your blog, such great stuff. I have an old jewelry box that I got in the 70’s that I may redo. One quick thing I saw the other day was to take the foam curlers from the Dollar Tree, the kind that twist on your hair. Remove the insides of the curlers and you are left with some miniature pool noodles. LOL. Anyway, cover them w/fabric and use them as ring holders. The tutorial I watched glued them on a painted picture frame from the back so that you had a standing ring holder, but I am going to use this idea in an Altoid tin for rings in a jewelry box for my granddaughters. I am making it out of a Whiskey box with a sliding plexiglass front. Will use hooks for bracelets/necklaces and another candy box for earrings.
I am still in process, but it should be lots of fun.
ducttapeanddenim says
Great idea! I’ll try that.
Sandra Lynch says
I found a large jewelry box to practice on. It is 18″W and 9/2 “H. I haven’t seen one like it on your site. It has drawers on both sides with a double door opening in the center. The center doesn’t have anything to hang necklaces on like a carousel or hooks and doesn’t have any marks indicating that there ever was anything there. I priced a carousel part but they are expensive compared to the cost of $8 for the box and it could easily use 2. The space is 8″ wide, 8 1/2 ” high and 4 1/2 ” deep. The back is mirrored. Any suggestions on how to utilize this space?
ducttapeanddenim says
Sandra, That sounds like an amazing jewelry cabinet! Did you check out D. Lawless Hardware online? They have some unique jewelry box hardware.
ducttapeanddenim says
And the cheapest thing would be little tiny cup hooks
Susan svoboda says
Hi i ran across your post on pintrest. I have an armoire i am redoing for myself. Chalk painted the outside already. But i am stumped as to know what to do with the inside. Its an awful green felt and it smells old. You painted yours??? How? And didnt it make it hard and crusty???
ducttapeanddenim says
Well, you could try pulling out the felt. That would be a lot of work but it might be worth it. If you paint it, just add extra water to the paint. All the chalk paint I have used on fabric has worked like this. But you may want to test it out on a sample piece before trying it on a large armoire. Good luck with your project!
Pam says
Hi Ann!!
I can’t get over your thrift find pieces. I found a jewelry armoire for the price of $20.00. It was missing 2 drawers and the mirror was cracked.
I ended up paying $40.00 for mine and it was in perfect shape. That was the lowest price in over a year looking. Some were as high as $100.00 and if it was a redo sell then it was $175.00.
I find up here in Canada we pay a lot more for second hand/thrift finds than those in the U.S. .I’m excited by my purchase and can’t wait to redo it!!👩
Enjoy the rest of the week!!
ducttapeanddenim says
Wow! That’s expensive! My daughter lives in Canada and I LOVE thrifting up there. I always find such different items.
Brandi N. Rubio says
Thanks for all your great ideas! (The ones in comments as well). I’ve been wanting to makeover thrift store jewelry boxes for some time now and have quite a few that I’ve found super cheap, and need to get going on them! Hubby is starting to get frustrated with all the jewelry boxes taking up storage space lol. I don’t know if ill sell them or gift, but I’d love to share them with you to get your opinion and/or ideas/comments on my finished projects. How would I share them with you?
ducttapeanddenim says
That’s so great to hear! You could join our Thrift Store Makeover group on Facebook and share photos. There are lots of helpful people in that group, too. https://www.facebook.com/groups/ThriftStoreMakeovers
Patricia says
Hello! I love all of your crafty ideas, and I have a question. On two of my boxes, customers have pulled on the drawers and pulled off the handles. The handles have a prong, and the drawer face has a hole and I used E6000 glue. I did mod podge the sides but they are about 2 years old now and surely have had enough time to dry but they stick, and the handles come off too easily! Is there a better glue or should I not mod podge the sides? I paint the sides or glue paper there and feel it needs some kind of varnish to protect it.
Thanks so much,
Patricia
ducttapeanddenim says
I’m so sorry to hear that. Looks like you live in Central Texas… I think our humidity sometimes causes decoupage medium to stick when it’s on the sides of drawers. Especially if it’s a tight fit. Do you have that problem with the sides when you paint them? If the drawers are tight I’d probably choose to paint and stencil instead of decoupage. But I do agree with you that the paper needs something to finish it off. Or you might switch out the handles for something that screws all the way through?