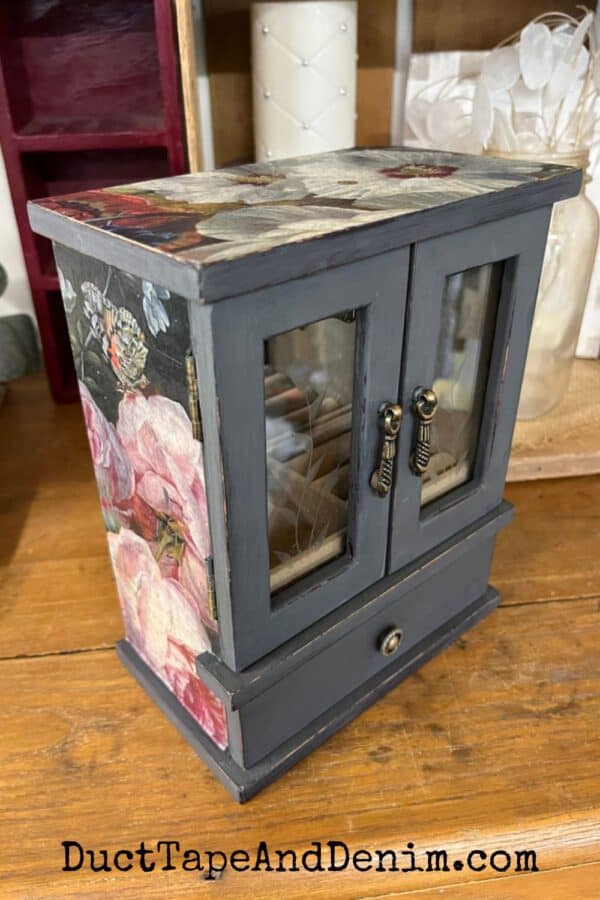
Recently I ran across a huge Hobby Lobby clearance sale and bought LOTS of my favorite chalk-type paint — DecoArt Chalky Finish Paint. I bought some of every color they had and I’ve spent the summer trying to find things to use it up on. One of the colors, Relic, was giving me a Dark Academia feel so I paired it with a beautiful piece of decoupage paper and added them both to this thrifted jewelry cabinet. Scroll down to get all the details and see the finished piece.
This post contains affiliate links. You won’t pay any more when you use these but I will earn a small commission on any purchases you make after clicking on them and I greatly appreciate it. Thanks for helping support my little blog!!!
Supplies for Thrifted Jewelry Cabinet Makeover
- jewelry cabinet, thrifted
- DecoArt Chalky Finish in Relic
- paint brushes
- decoupage paper — I used French Typography and Bright Florals by SalvageScapes.
- decoupage medium — I used Decou-Page Matte
- sanding block
- DecoArt Soft Touch Varnish
- Rub N Buff Metallic Wax, “Gold Leaf”
- rags
{{{See a complete list of what’s in my toolbox and supply cabinet.}}}
Before Painting the Dark Academia Jewelry Box
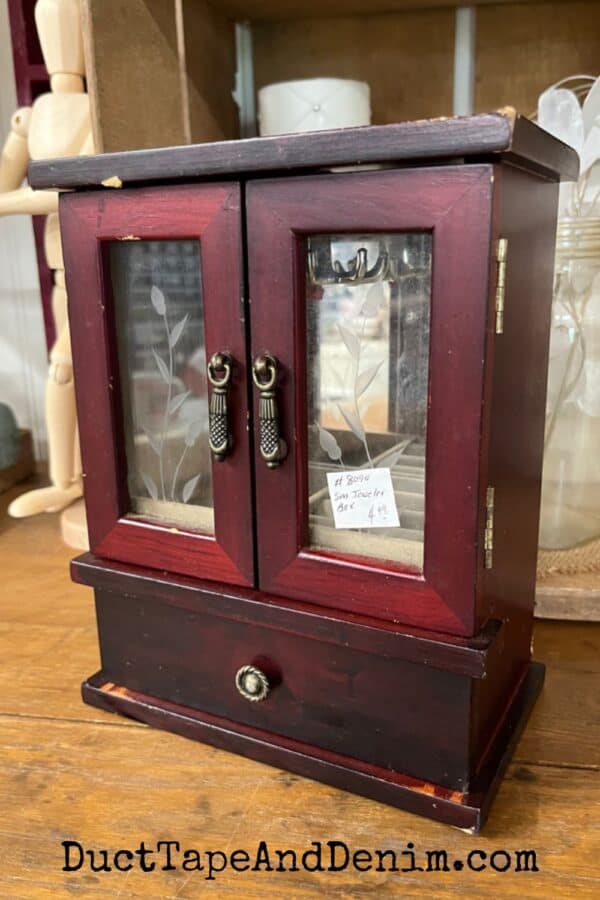
This was a dark “wood” jewelry box that I bought for $4.99 at an antique mall, Shabby Chic Antiques. It had a good amount of wear — dings and scratches. But it was solid and clean inside, which meant that all I had to do was paint it… but I decided to do a little extra!
Step-by-Step Instructions
Remove Hardware and Glass
The drawer handles were permanently attached and I was afraid I would damage the little cabinet if I pulled them out. I didn’t remove the hinges either. The glass was held in by little pieces of metal and tiny screws so that was easy to remove.
TIP: Make sure you put all your hardware together in a safe place, ie small jar with a lid, zipper baggie, etc.
Clean
I usually use whatever cleaner I have nearby. These are the cleaners that I usually have on hand:
- Clorox wipes
- Windex (or generic) glass cleaner – for the glass doors but I’ve also used it on the entire piece
- Krud Kutter — Use if the piece feels greasy at all.
- Goo Gone — Great for removing stickers and price tags!
Whatever all-purpose cleaning spray you have will probably work.
Painting Tips
- This dark gray chalk paint only needed one coat to cover the old wood finish.
- I always start with the jewelry box upside down so I can see parts that I might miss otherwise.
- If your chalk paint seems thick add a bit of water OR
- Use a mist sprayer to get the wood surface slightly damp before painting.
- Allow the first coat to dry completely.
- For the second coat, either water down a little of the paint or dip the paintbrush in water before dipping in the paint.
- Use a small artist’s brush to get into small, tight areas.
Decoupage
I just happened to have this beautiful decoupage paper from Zazzle. They sell a couple of weights of decoupage paper, 10lb and 18lb. Go ahead and spend the extra few cents to get the heavier weight. It works so much better. (Don’t ask me how I know…lol.)
This shop sells LOTS more similar papers that would all look great in a Dark Academia bedroom.
Distress
I used a 180-grit sanding block but you could also use sandpaper or wet distress. Take off as much or as little paint as you want.
If you don’t want a distressed look, sand very lightly with 220-grit sandpaper.
Top Coat
After wiping off all the sanding dust, I gave the jewelry cabinet one coat of DecoArt Soft Touch Varnish and let it dry overnight.
Wax Hardware
Sometimes I paint the hardware, sometimes I don’t do anything to it. But on this project, I used Rub N Buff Metallic Wax, “Gold Leaf”. I just dabbed my finger in it and lightly rubbed it across the surface of the handles. Then I buffed it off with a soft cloth.
Replace Hardware and Glass
After the top coat has dried overnight, I replaced the glass.
Sometimes I replace the glass with metal or screening but since this was nice glass with etching, I left it.
After Video
I’m currently working on a video showing step-by-step how I did this project. Until then, watch this little Facebook Reel recap video.
FULL VIDEO — coming soon
Finished Dark Academia Jewelry Cabinet
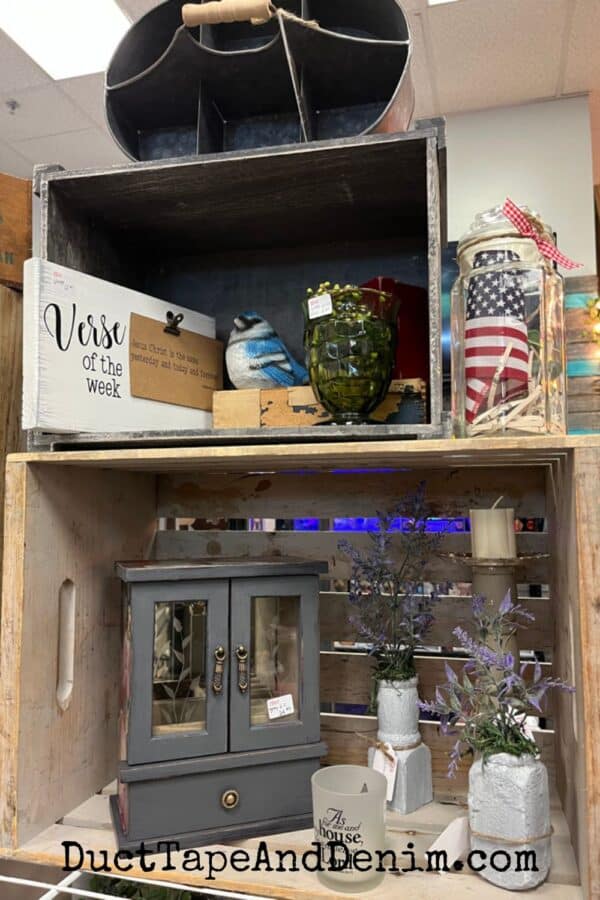
I thought this was a good color choice but lighter neutrals still sell faster in my booths. For those of you who are wondering, it sold, but it did take a while — about 3 months. I had it marked $34.99 and I think it sold during a 20% off weekend.
And here it is in my booth display.
I guess Dark Academia isn’t very popular in our area. Light colors and farmhouse are STILL selling!
More DIY Jewelry Cabinet Makeovers
If you enjoyed this post, you might also like these:
- 10 Things You Need to Know Before Trying Jewelry Cabinet Makeovers
- 16 Thrift Store Jewelry Box Makeovers Anyone Can Do
- An Easy Jewelry Cabinet Makeover with Beautiful Gold Wax
- How to Create a Colorful and Unique Turquoise Drip Jewelry Cabinet
- An Easy “Green” Way to Upcycle a Thrift Store Jewelry Cabinet
Thanks for reading! Please let me know if you have any questions about my thrift flips!
‘Til the next project,
Ann @ Duct Tape and Denim
Pinterest | Instagram | Facebook | Twitter | Etsy | YouTube


Hancocks London says
Love the moody vibes of this dark academia-inspired jewelry cabinet! 🖤💍