How to update your thrift store finds and make beautiful drawers in jewelry boxes, dressers, or other furniture with Iron Orchid stamps.
I was on a hunt… walking the linoleum aisles of the familiar store in the fluorescent lighting. Surrounded by the subtle scent of body odors hanging onto the used clothes. But it’s not clothes that I was after that day. I was continuing my hunt to save every old jewelry cabinet from thrift stores across the country! That’s when I spotted this sad, little, plain-Jane jewelry cabinet.

Today I’m sharing this painted jewelry cabinet makeover with a special surprise inside… Iron Orchid stamps on the sides of the drawers. This is a super easy technique that will really boost the design of your thrift store makeovers, whether you’re painting a jewelry box, dresser, desk, or any other piece of furniture that has drawers.
This post contains affiliate links. You won’t pay any more when you use these but I will earn a small commission on any purchases you make after clicking on them and I greatly appreciate it. Thanks for helping support my little blog!!!
Supplies Used for this Jewelry Cabinet Makeover
- old jewelry cabinet
- blue paint – I used DecoArt Satin Enamel in Seaside Blue
- black paint
- glazing medium
- paint brushes
- paper plate
- foam roller
- Iron Orchid stamp
- pie plate (or any other shallow dish)
- dishwashing soap
- decorative metal
- tin snips
- E6000
{{{See a complete list of what’s in my toolbox and supply cabinet.}}}
How to Paint a Jewelry Cabinet
The first step in painting any thrift store find is always to clean it. You can read more about how I clean my thrift store haul HERE. Once the jewelry cabinet was clean, I removed the glass from the doors and the trim that was around them. Most jewelry cabinets don’t have this piece. The piece was plastic made to look like metal so I didn’t really want to keep it.  If the handles are screwed in, I’ll remove them. Since these weren’t, I left them in. Sometimes I paint around them but today I painted and glazed right over them. Chalk type paints are super easy to use. I just painted on two coats, letting it dry completely between coats. Once the second coat was completely dry, I mixed some of the black paint with my glazing medium, painted it over, and wiped it off before it dried. No varnish or top coat is needed after this.
How to Use Iron Orchid Stamps
These stamps from Iron Orchid would be beautiful all over this piece but I wanted a special little surprise when the drawers were opened. Pour (or dip) out a little black paint on the disposable plate, roll it onto the stamp, and press the stamp onto the side of the drawer. That’s it! 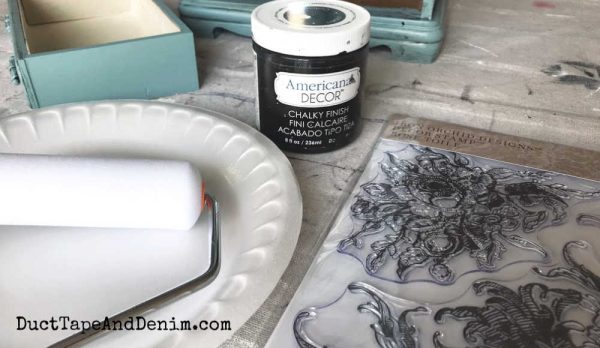 It’s important to keep your stamps clean so I had a dish of warm soapy water nearby to drop it in when I finished. HINT: The chalky finish paint started to gunk up after a while. Next time I’m going to use regular black acrylic paint.
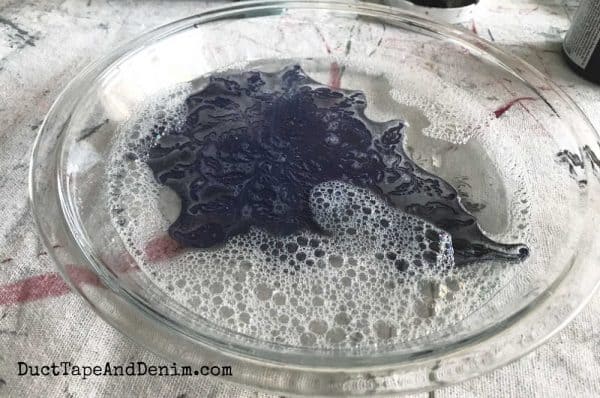
In this video, the creators of Iron Orchid stamps show you several ways to use them. Skip over to 5:34 to see the “bare” method. That’s what I used for this project. I just used clear stamps WITHOUT an acrylic block or any kind of backing.
And here’s how it turned out. What do you think? 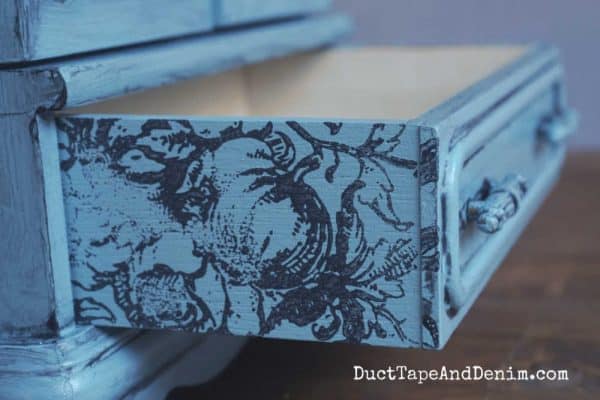 I removed the old glass out of the doors and replaced it with a piece of decorative metal that I cut to fit with tin snips. Then I just glued it in with my E6000. I also put together a list of other products you could use to replace the glass in THIS ARTICLE.
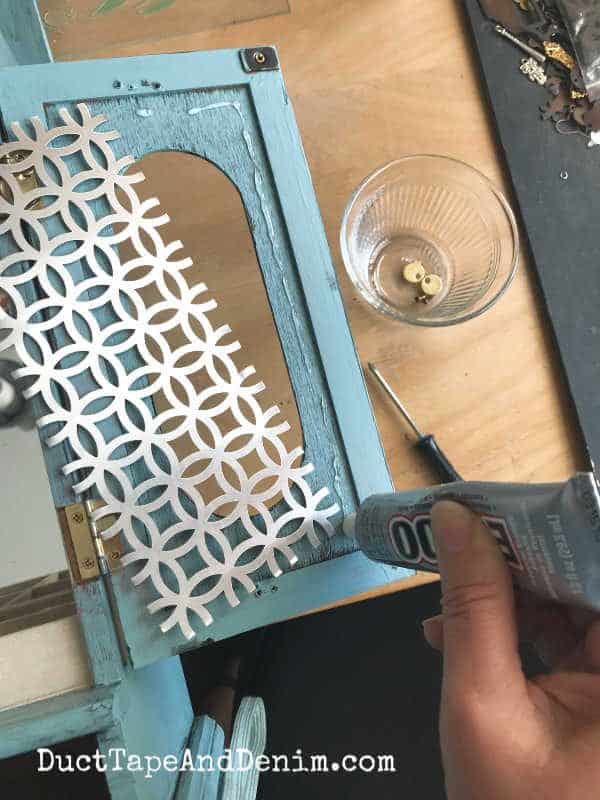
Finished Jewelry Cabinet Makeover with Iron Orchid Stamps
The inside was in good condition, just a little dusty. So I wiped it out with a damp cloth. How does it look now?  I even like how the painted handles looked. So much easier than removing them!
  And here it is staged for sale…
  (SOLD at Paris Flea Market.)
More Thrift Store Upcycles You Might Like
If you enjoyed this thrift store makeover, you might also like these:
- Red Jewelry Cabinet with Stenciled Drawers
- Black Glaze on a Green Jewelry Cabinet
- Turquoise Drip Paint Finish on a Jewelry Cabinet
- Tips for Painting with Chalk Paint
- 15 Jewelry Storage Ideas
Now take a look at these upcycled projects from my upcycled blogging friends!
Thanks for reading about this month’s thrift store upcycle project. And remember not to overlook the sides of the drawers when you’re painting a jewelry box, dresser, desk, or any other piece of furniture that has drawers.
‘Til the next project,
Ann @ Duct Tape and Denim
Pinterest | Instagram | Facebook | Twitter | Etsy | YouTube
Jenny says
Your new jewelry box is very pretty. i like the decorative metal on the doors.
Angie says
I’m so glad you left the handles! This turned out so pretty and those drawers are amazing!!
Gail says
The transformation is absolutely gorgeous, Ann! I can see why this lovely jewelry cabinet sold quickly! And I love the special touches you made to the drawers and overall appearance! They really help to make it quite unique!
Cheryl Atkinson says
Hi Ann, such a cool make over. i wouldn’t have changed out the hardware either. What else besides what you used, can you use to cover up the glass parts? How much do you usually sell these for? I guess i can look on Etsy to see what they go for. Thank you for the inspiration!!
Cheryl
ducttapeanddenim says
I’ve sold a few on Etsy. I think they were between $35-45. In local shops I sell them between $20-45… depending on size and details. I see some as high as $120!
Cheryl Atkinson says
I really love this. I am just starting to play with the IOD stamps. First couple of times my fingers would stick to the stamp so they looked bad. Real bad. Any pointers would be appreciated.
ducttapeanddenim says
Did you use the plastic sheet on the back? Other than that my biggest pointer would be to not use too much paint.
Lynn Beaudry says
This box is absolutely beautiful! Thank you for sharing!
Marjorie says
I loved that you decorated the sides of the drawers, I never would have thought of doing that. Thanks for the inspiration!