Last year we tore down a few fences around the farm and you know us… we don’t like to waste anything. One of the things that I made was a little forgiven sign. The size of this stencil is perfect for those small scraps that I didn’t know what to do with.
This post contains affiliate links. You won’t pay any more when you use these but I will earn a small commission on any purchases you make after clicking on them and I greatly appreciate it. Thanks for helping support my little blog!!!
{{{ Sign up for our email newsletter and get ALL my future projects sent straight to your inbox! }}}
Supplies for Stenciled Forgiven Sign
- a scrap of barn wood
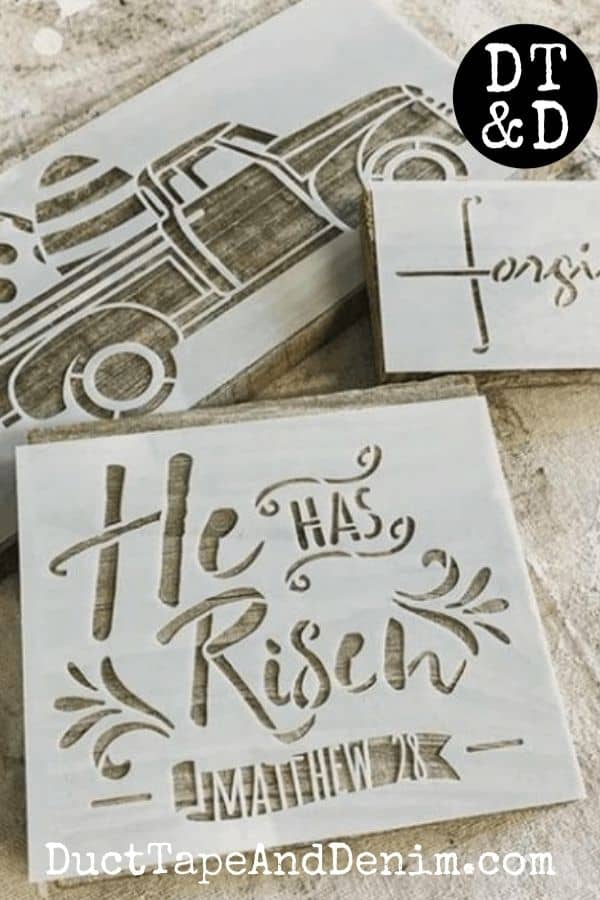
- forgiven cross stencil – I like ordering stencils here because they have so many different size choices in each stencil.
- white paint
- stencil brush
- washi tape (optional)
{{{See a complete list of what’s in my toolbox and supply cabinet.}}}
How to Make Mini Signs or Shelf Sitters
Stenciling on barn wood is a super quick and easy project! There’s no base coat so you can get to the stenciling much quicker.
STEP ONE: Clean the Barn Wood
Even though there is no painted base coat you should clean the barn wood. Luckily, our wood wasn’t very dirty. I just brushed it off with a nylon brush, often sold as a tool to clean the bathroom shower.
STEP TWO: Tape Down the Stencil
This step is optional but it’s very helpful to tape the stencil to the barn wood so it doesn’t move while you’re stenciling.
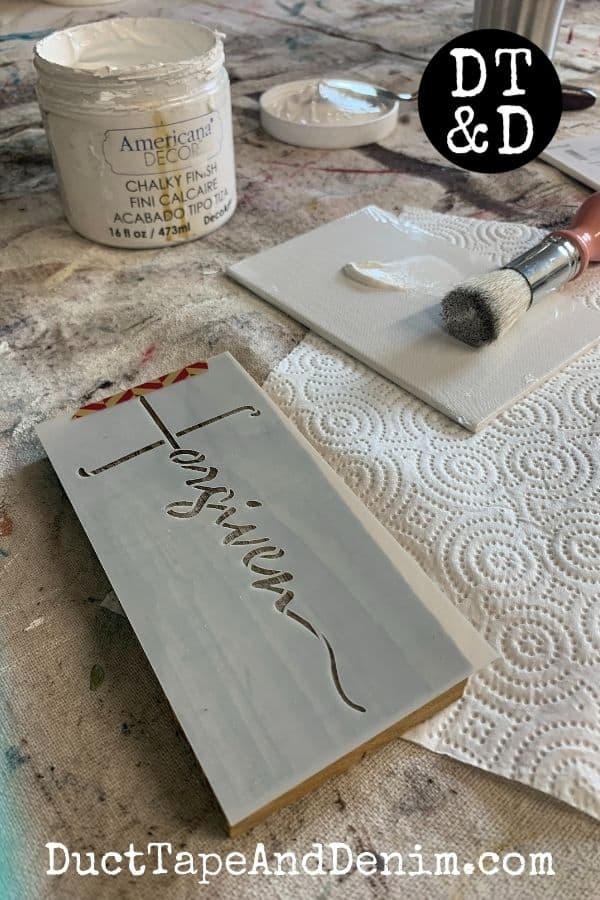
STEP THREE: Stencil
I prefer using a stencil brush when stenciling on barn wood. It seems like the bristles help get the paint down into the rough wood better.
You’ll see in the video below that when I used the same stencil on smoother lumber that I used a makeup sponge. You can use whichever tool you feel more comfortable with.
STEP FOUR: Add the Hanger
If you’re going to use this as a shelf sitter you can skip this step. But if you’d like to hang it, just measure the back and tack a sawtooth hanger in the center.
That’s it!
I don’t usually add a varnish to barn wood signs but if you would like to, I would recommend spray shellac like Zinsser.
Stenciled Cross Sign Video Tutorial
VIDEO — COMING SOON
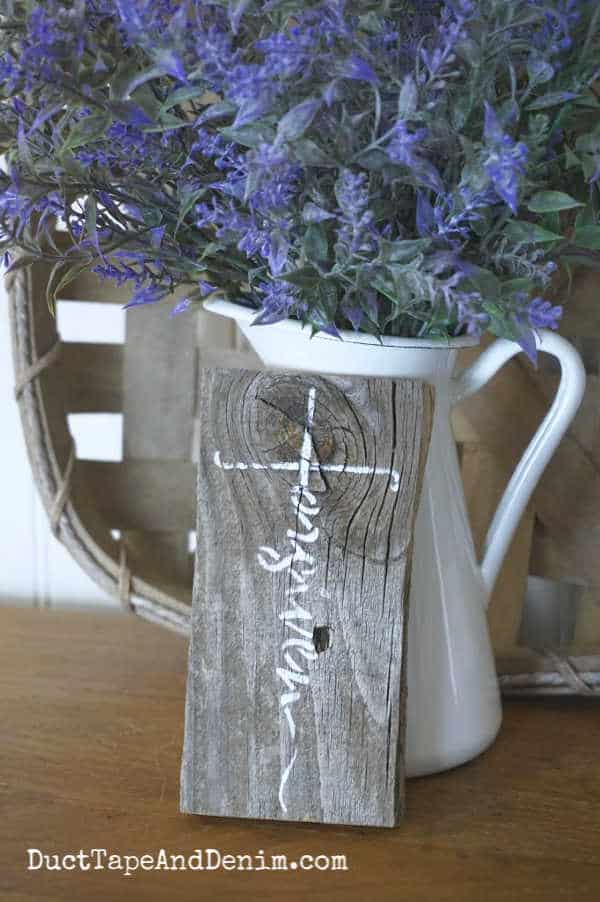
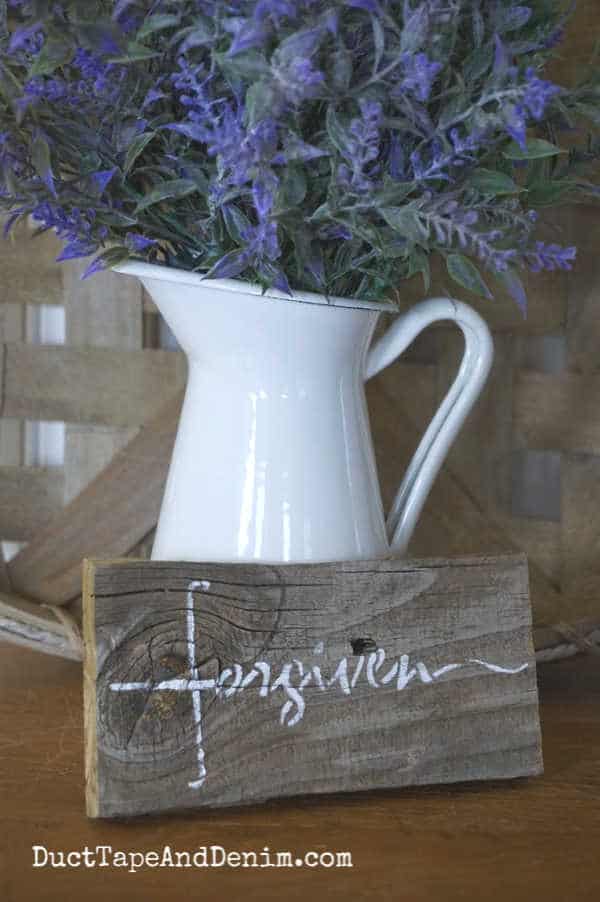
Finished Easter Decor Shelf Sitter
And here’s the finished sign. I’m actually using mine as a shelf sitter. The gray of the barn wood looks great with lavender and my enamel pitcher from IKEA!
More Easter Crafts
If you enjoyed this DIY Easter craft project, you might also like these:
- How to Make an Easter Egg Angel Ornament
- DIY Easter Egg Truck Sign (also on barn wood)
- How to Make Newspaper Carrots
- How to Make Clothespin Carrots
- Easy Stenciled Home Sweet Home Sign
Thanks for reading our blog and please share our links and photos! We appreciate you all!
‘Til the next project,
Cheri Mello says
COOL 😎 Sign ANN 👍🏼♥️thank You ❗️IT SAYS IT ALL 😊👍🏼👏🏼♥️G-d♥️Bless