Remember seeing this stack of thrift store finds a few weeks ago? I ended up painting most of them red for Christmas. Today I’m showing you the ones I used my Merry and Bright stencil on. Many of you have told me you haven’t had a good experience with stencils. Scroll down to see my stenciling tips and I’m sure you’ll have to problem next time.

This post contains affiliate links. You won’t pay any more when you use these but I will earn a small commission on any purchases you make after clicking on them and I greatly appreciate it. Thanks for helping support my little blog!!!
Sign up for my FREE 12 Days of Christmas Crafts email series!!!
Merry and Bright Stencil Makeovers
- wooden thrift store finds
- Merry and Bright stencil
- washi tape
- Americana Decor Chalky Finish Paint, Rogue
- Americana Decor Chalky Finish Paint, Everlasting
- stencil brush
- Americana Decor varnish
- paint brush (I like this paint brush.)
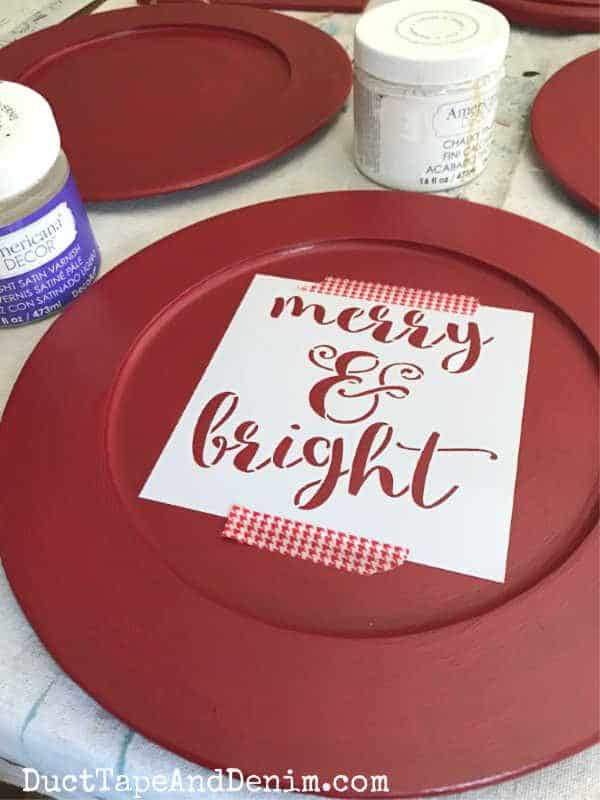
These three round pieces started out as wooden chargers from World Market. The original stickers were on the back even though they were used and scratched up. I think I paid $1.50 for each of them.
First, I brushed on a couple of coats of red paint.
Before stenciling, I added a coat of varnish. That’s my usual technique when I use chalk-type paints. It allows me to distress the stenciled part without removing the base coat. And the colors won’t bleed into each other.
When the varnish was dry, I used washi tape to hold the merry and bright stencil in place. Sometimes I use spray adhesive to hold my stencils but washi tape worked well for this DIY project.
See what a simple project that is? The longest part was just letting the paint and varnish dry.
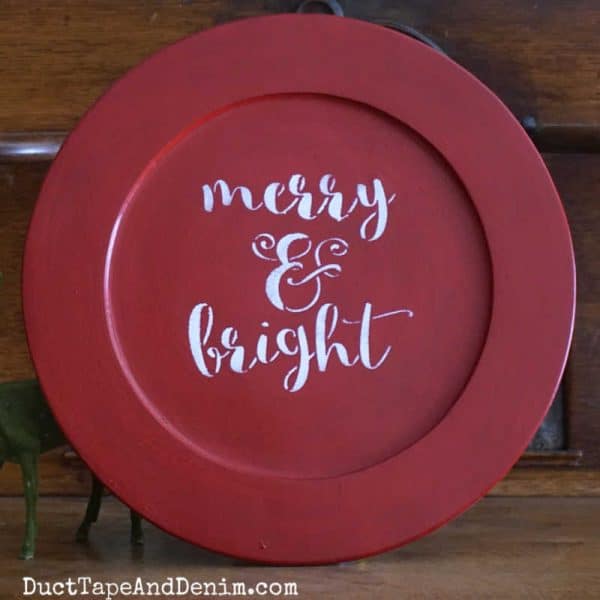
You could seal it well and still use it as a charger but I’m just going to lean it up against something behind my vintage Christmas deer.

Stencil Tips & Tricks
- Varnish before stenciling.
- Hold stencil in place with washi tape or spray adhesive.
- Offload paint before stenciling. It’s better to do a couple of light coats than one heavy.
- Carefully remove the stencil before paint dries.
- Wash the stencil in warm soapy water before the paint dries. (Stencils will still work even if you don’t get all the paint off.)
- If you have some bleeding under the stencil, sand it lightly after it’s dried.
- When using chalk paint, make sure you seal it with wax or varnish.
If you enjoyed seeing this project with my merry and bright stencil, you might also like these thrift store makeovers with stencils:
- How to Update Thrift Store Finds with Christmas Tree Stencils
- How to Make an Easy O Come Let Us Adore Him Sign
- How to Update Old Cutting Boards with Christmas Stencils
- Jewelry Box Makeover with Stencil
- My Favorite Source for Stencils
I had so much fun making these… I’m off to the thrift store to find more items to stencil. Leave a comment and let me know what you think I should try next.
‘Til the next project,
Mazy says
House painters trick for paint bleeding under tape ( or under stencil ) first coat with the background color let it dry 20 minutes then paint with stencil color. So the paint that bleeds under matches the background color aka no bleed.
Maria Brittis says
love the beautiful color red.
Linda at Mixed Kreations says
What a fun idea! Love the bright color and the stencil.
Kathy A says
Love the cheerfulness of the red! Great project!