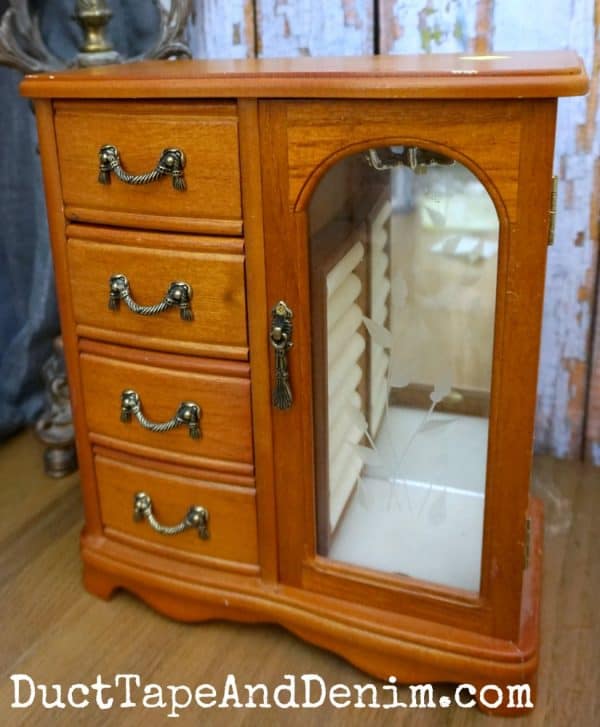
Happy New Year! We’re gonna start it off with my favorite kind of project – a thrift store makeover. This time we’re making over a jewelry cabinet with mirror. Here’s what it looked like when I found it at the thrift store. I think this one was $7.99 at Goodwill.
This post contains affiliate links. You won’t pay any more when you use these but I will earn a small commission on any purchases you make after clicking on them and I greatly appreciate it. Thanks for helping support my little blog!!!
{{{ Sign up to receive all my thrift store makeovers in your inbox! }}}
Light Blue Jewelry Cabinet with Mirror Supplies
- Americana Decor Chalky Finish paint in Vintage
- Americana Decor Light Satin Varnish
- paint brushes
- sandpaper
- DecoArt Decoupage Glue, matte
- 7Gypsies scrapbook papers
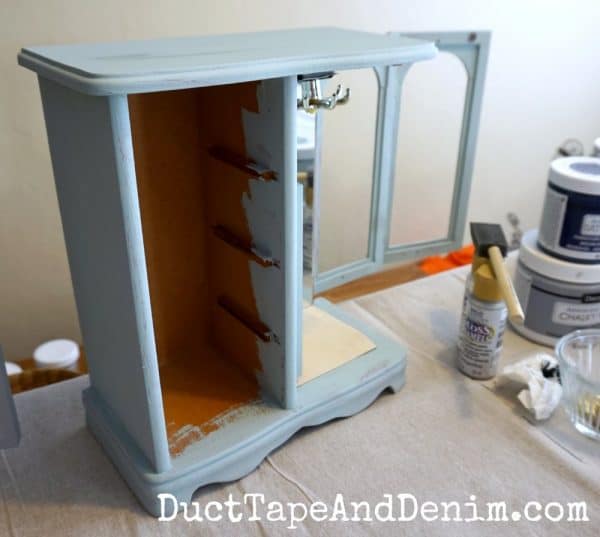
This jewelry cabinet was in great shape so I just cleaned it up before painting. The chalky finish paint doesn’t need any other prep.
I usually save up a few thrift store projects and have a big painting day once a month or so. Looks like I painted something blue and gray this day, too!
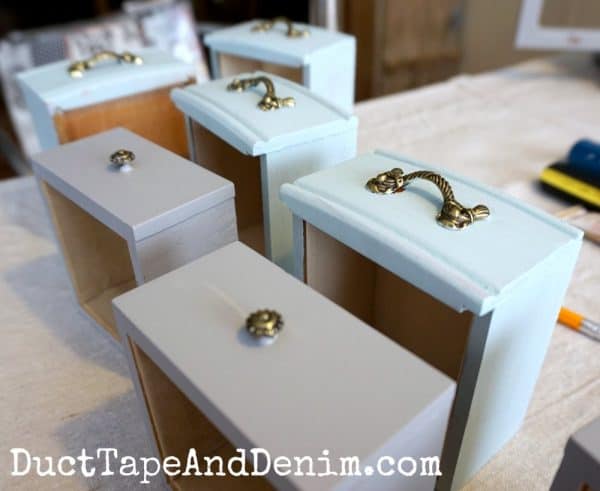
I always take the drawers out and paint them separately.
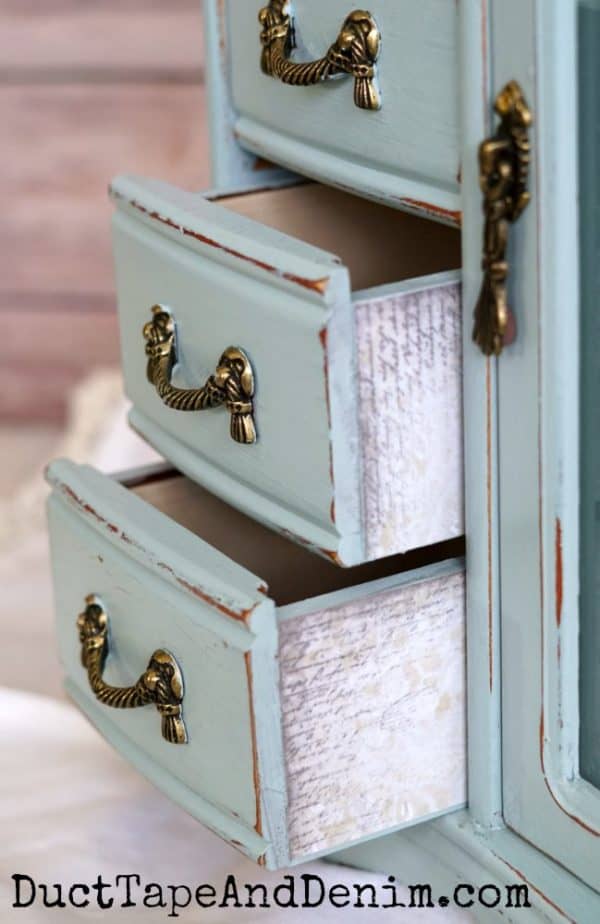
I gave it two coats of paint, lightly distressed it with sandpaper, and topped it with a coat of satin varnish.
VIDEO – coming soon!
I painted the sides of the drawers but then I decided to decoupage some scrapbook papers on the sides. The scrapbook papers are from a 7Gypsies paper pad.
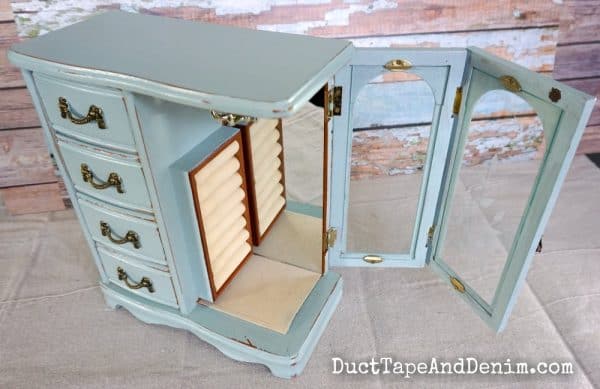
This cabinet also had a nice side open door with a ring holder and mirror inside.
For those of you who are always asking… I sold this for $30.00. I can’t remember if it sold at Paris Flea Market or one of the other markets I went to. Our fall was so busy everything kind of runs together! I really love this light blue paint with the brass hardware.
If you enjoyed this jewelry cabinet with mirror, you might also like these:
- Jewelry Cabinet Makeover with Folding Door
- Turquoise and White Jewelry Cabinet Makeover
- From Flea Market Finds to Savvy Storage
- Pink Jewelry Cabinet
- DIY Cake Stand
Thanks for reading!
‘Til the next project,
Ann @ Duct Tape and Denim
Pinterest | Instagram | Facebook | Twitter | Etsy | YouTube



Florence @ Vintage Southern Picks says
Thanks for telling what you sold it for Ann. The one and only jewelry cabinet makeover I did on sold on Etsy sold for that, but it took so long, I was thinking I was asking too much. Glad to have a comparison. This turned out so pretty. When you put the paper on the sides of the drawers, do you have a problem with them not going in/out well? Wondering what you do about that if so.
ducttapeanddenim says
Thanks, Florence! No, I haven’t had a problem with the drawers sticking at all. But none of mine have been very snug to begin with. And I make sure I let them dry for 24+ hours before putting them back in the cabinet.
Audra @ Renewed Projects says
What a beautiful makeover! I had a similar jewelry box that I flipped Frozen-style for my daughter. She accidentally broke one of the glass sides, sigh, so it’ll stay Frozen forever now since I”m too lazy to track down replacement glass. Amazing how much you sold it for!
ducttapeanddenim says
oh no… I’m working on an article now about options other than glass for the doors. I’ve used sheets of metal, chicken wire, and hardware cloth before, too. Or you could use balsa wood and just paint it or cover it with fabric.
Julie says
I have a couple of jewellery boxes that are sitting in the cupboard waiting for a makeover session. I love how you give us the details of what you do for inspiration. Thanks.
ducttapeanddenim says
Thanks! I’d love to see how they turn out.
Emily says
This is a great makeover! What an easy way to reinvent this jewelry box. Thanks for linking up with Merry Monday – I pinned your project to our group board and will be featuring it at our upcoming party. Hope you’ll stop by and link up again!
Julie Pollitt @ Back To My Southern Roots says
Wow! You really changed the look of this. I love the way you put decoupage on the sides of the drawers. I would never have thought about doing that, but I love the way it turned out. You are so creative!
Theresa says
Love your makeover. Thanks for sharing at the Inspiration Spotlight party @DearCreatives pinned & sharing
Lois meyer says
I didn’t receive an e-mail
ducttapeanddenim says
Thanks for signing up, Lois! Check your spam… I see that you’re signed up on my end. I’ll send you an email, too, to see if you’re receiving my emails.
Lisa Jensen says
I have been admiring your jewelry box makeovers for quite a while and have watched several of your video tutorials. Decided to attempt this and found it’s LOTS of fun! I do have a question, though…how do you clean stains off of the “flocked” lining pieces? I’ve tried baby wipes and they do a pretty good job, but I’ve run into a couple of drawers that could use some help. What is your solution?
ducttapeanddenim says
I do use baby wipes a lot… or just a damp washcloth. But sometimes they’re stained. That’s when I either paint the lining or cover it. I’ve used burlap, tissue paper, scrapbook paper, or other fabric. Sometimes I’ve pulled out the old lining and other times just decoupaged over it. Keep going through my old projects…. you’ll see a few examples of those.
Let me know if you have any other questions.
Louise says
I’m loving your jewelry box make overs. I’m 75 years old and collecting some from thrift stores hoping redo them and make a little money from selling them. I love yours and all the information you are giving us. I can’t wait to get started on them 😀
ducttapeanddenim says
Thanks for letting me know! Have fun!