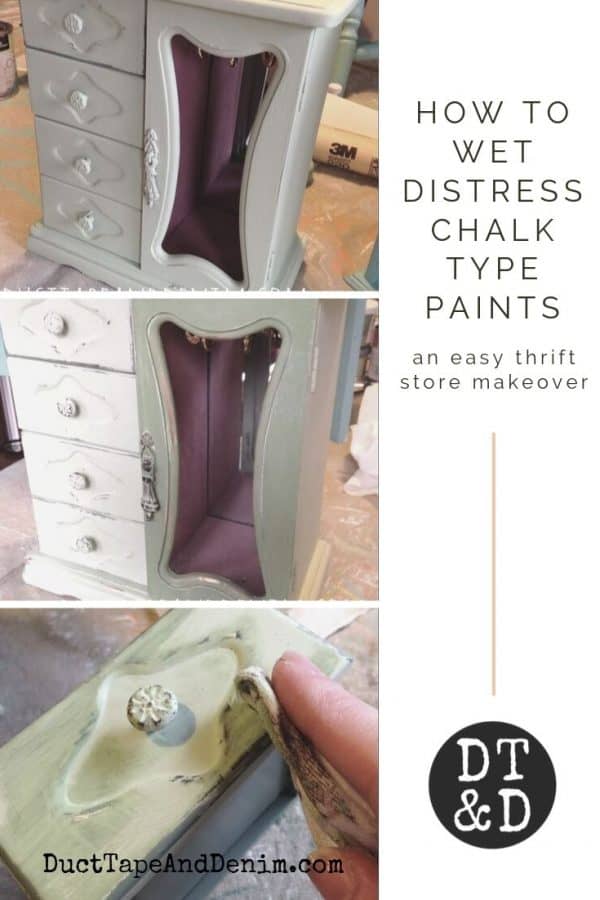
Every DIYer needs to know how to wet distress chalk-type paint for their shabby thrift store makeovers. Today we’ll learn how.
Today’s jewelry cabinet makeover is a throwback to a little over FIVE years ago. This is one of the first jewelry cabinets I shared on my blog. It was written back when our shop sold Cece Caldwell’s chalk and mineral paints. That was the first brand of chalk-type paint that I ever used. Since then I’ve used quite a few different brands. I even wrote an article just about the different types of paint I use.
Most brands are pretty similar and I think CeCe has changed the formula of her paint since I wrote this. But overall, there’s not much difference between most chalk-type paints.
Anyway, keep scrolling down to see the rest of this project. Even though it’s not new, wet distressing is a good technique to know about.
BEFORE painting with CeCe Caldwell chalk and mineral paint.
This post contains affiliate links. You won’t pay any more when you use these but I will earn a small commission on any purchases you make after clicking on them and I greatly appreciate it. Thanks for helping support my little blog!!!
CeCe Caldwell Chalk and Mineral Paint
Most people I talk to call CeCe Caldwell paint, “chalk paint”. It is similar but it’s actually a mineral paint using clay, porcelain clay, and chalk in a water-based solution. They have no VOCs, acrylic co-polymers, solvents, formaldehyde, ammonia, ethylene glycol, or toxic heavy metals.
But you probably won’t be thinking about those things when you paint with it. You’ll just be thinking about how easy it is to use.
As I mentioned in an earlier post, I really love using it. Mainly because there is so little prep work. I really don’t like stripping and sanding. With CeCe Caldwell’s you can pretty much paint over anything! Our shop owner says you don’t even need to clean your piece… but I do anyway.
One more thing… I also love it because it doesn’t smell and I can paint inside.
Supplies for Wet Distressed Jewelry Cabinet
- chalk-type paint
- paintbrush
- soft rags
- Minwax Polycryclic (or wax if you prefer)
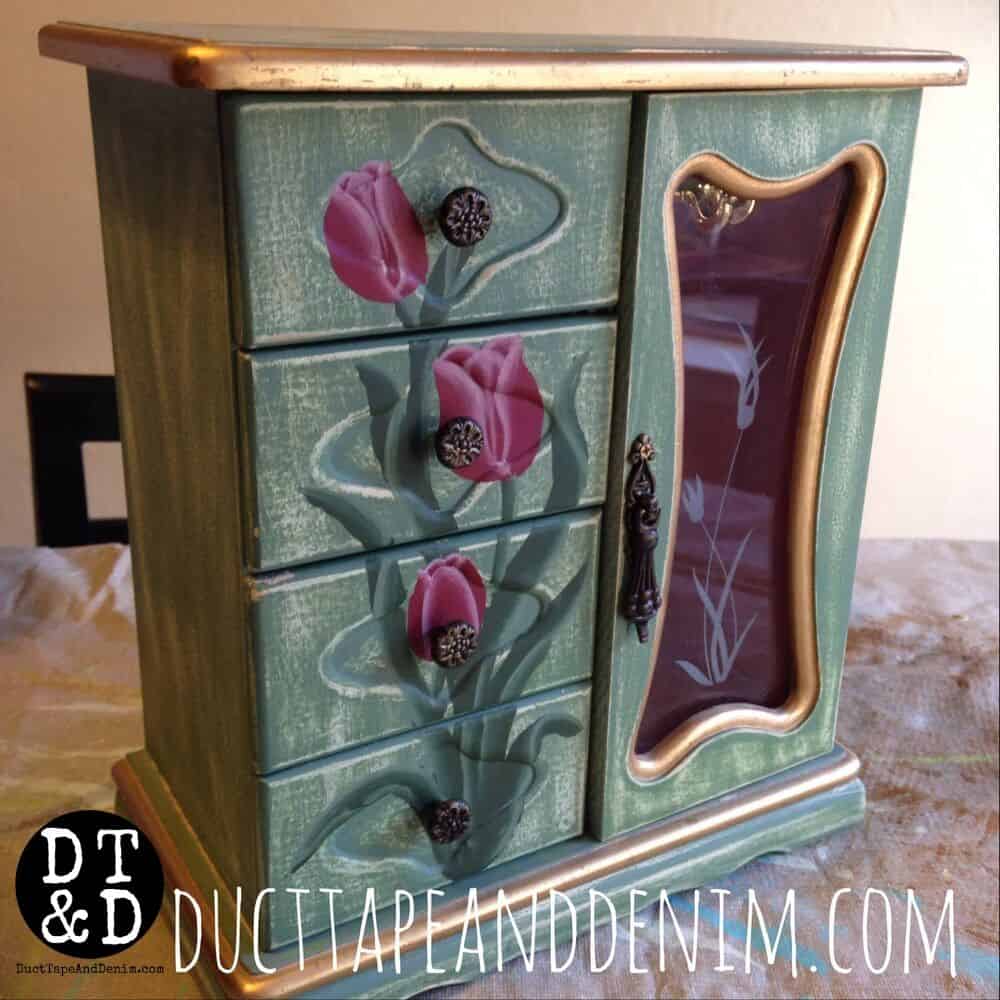
This little jewelry cabinet is the last thing I painted with CeCe’s paint so I took a few step-by-step photos since some of you have asked. The first photo above is what it looked like when I found it at the thrift store. It was in the best condition of any of the recent jewelry boxes I’ve bought! But it had those flowers painted on the front… and I’m not really a flowery kinda girl.
First I took out the glass. Glass is usually held in place with some little metal pieces and all you have to do is unscrew them. Then I wiped down the cabinet just to make sure there wasn’t any dirt or stickers on it.
Then I just slapped on two coats of paint, letting the first coat dry completely before starting the second. The first time you use this paint, don’t worry that it doesn’t look like the color you planned. One thing about this paint is that is must be sealed. CeCe Caldwell sells several different waxes and finished. But I’ll be honest with you… I haven’t gotten the hang of those yet. I still go back to my Minwax Polycrylic in a satin finish. Maybe one day I’ll figure it out and switch over to wax.

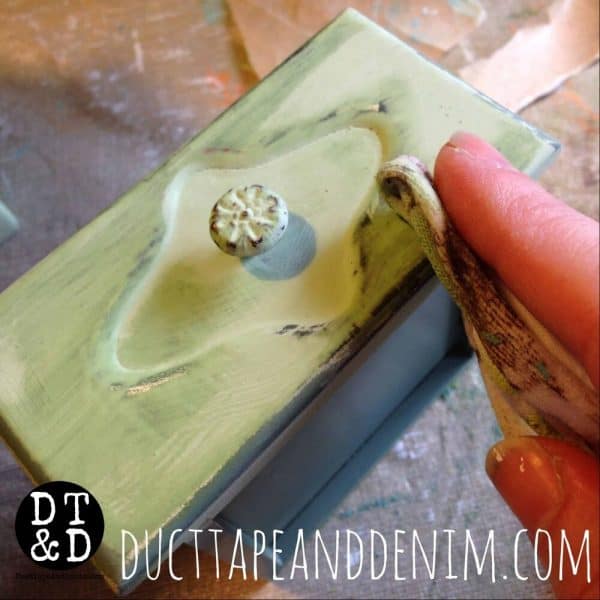
Here’s the second major reason I love the paint so much. I like to distress my jewelry cabinets. With this paint, I don’t have to sand. All I have to do is wipe off the paint with a wet rag!
How to Wet Distress
You can see in the close-up photo of the drawer that the paint gets darker when it gets wet, too. Just rub ’til you get the amount of distressing you want. It looks a little different than if you sand.
After the paint has completely dried again after rubbing it with a wet rag I apply the Minwax Polycrylic with a paintbrush. It’s also water-based so the brush will clean up easy. But I do keep a separate brush just for this finish.
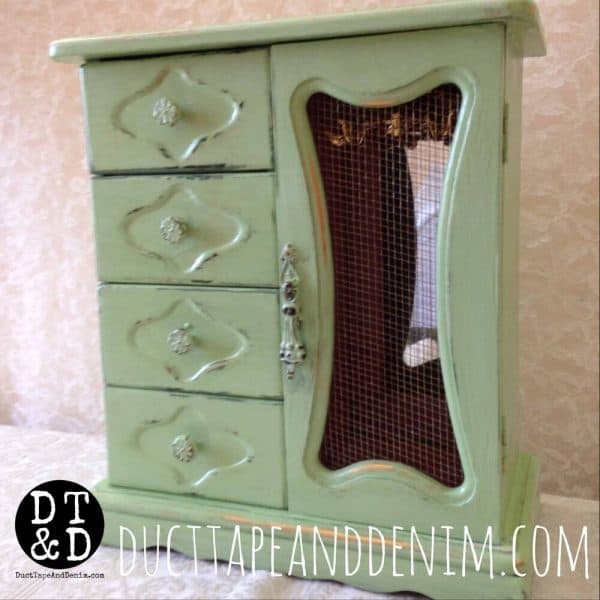
Now you’ll be able to see what the end color will really be. I took this photo when I had just brushed the door with the polycrylic. See what a different? After the first coat dried completely I sand everything down with 220 grit sandpaper. Then wipe down with an old t-shirt or knit rag. Sometimes I add another coat of polycrylic, especially on the top. Let dry again. Sand again.

In the last photo you can see the wire I added in the door. It came from OSH. I’m not sure exactly what it’s called. It’s a little like hardware cloth, which I’ve also used. But this is a lot smaller and the wire is lighter. I cut it with wire cutters and staple it in.
More Painted Jewelry Cabinet Makeovers
If you enjoyed this DIY project, you might also like these:
- A Green Jewelry Cabinet with Black Glaze
- Light Blue Jewelry Cabinet with Scrapbook Paper
- A Jewelry Cabinet Makeover Where I Actually Used WAX
Thanks for reading! I hope this has inspired you to paint some thrift store jewelry cabinets and try wet distressing!
‘Til the next project,
Ann @ Duct Tape and Denim
Pinterest | Instagram | Facebook | Twitter | Etsy | YouTube

Leave a Reply