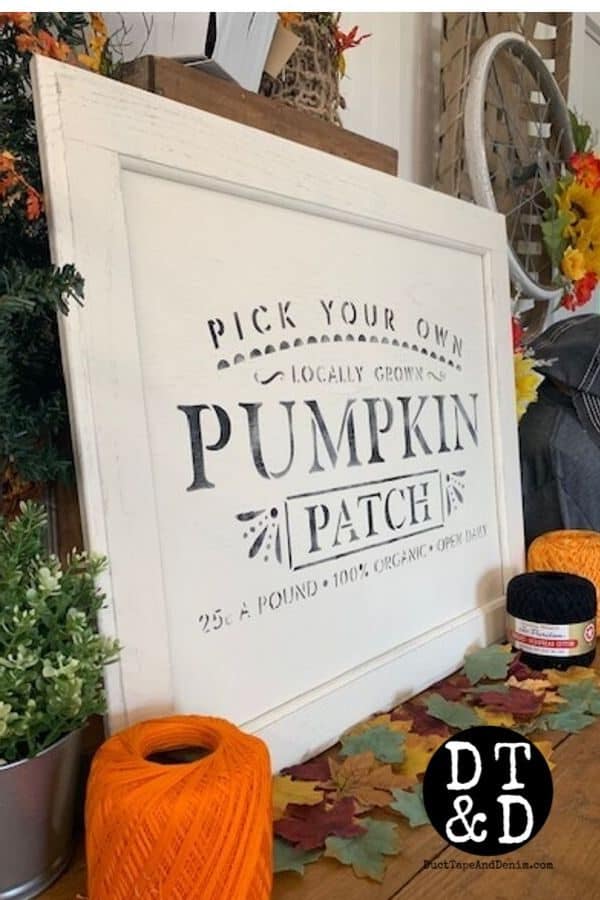
This simple pumpkin patch sign started its life as an old kitchen cabinet door. Well, it probably had a long and useful life before that but I rescued it from a pile of old doors on our last trip to First Monday Trade Days in Canton. It was just one of the wagon full of doors and windows that we pulled around the flea market that day.
It’s the light-colored one… sticking right out of the top of my wagon in the photo below.

That was a fun weekend in Canton. It’s a huge sale that takes more than one day to see. We were there for two full days and still only went through about half of the vendors. But we filled our Jeep!
You can read more about First Monday Trade Days in Canton in THIS article.
This post contains affiliate links. You won’t pay any more when you use these but I will earn a small commission on any purchases you make after clicking on them and I greatly appreciate it. Thanks for helping support my little blog!!!
Supplies for DIY Pumpkin Patch Sign
- old kitchen cabinet door
- spray paint – I used Rust-Oleum Satin Heirloom White
- pumpkin patch stencil
- black paint
- washi tape
{{{See a complete list of what’s in my toolbox and supply cabinet.}}}
How to Stencil a Pumpkin Sign
One: Clean the Door
This was a necessary step for this door! The vendor we bought these from had a whole pile of old cabinet doors. They looked like they’d been outside for a while and were VERY dirty. Most were pretty rough but they were a good price so we sorted through them and found the best of the bunch.
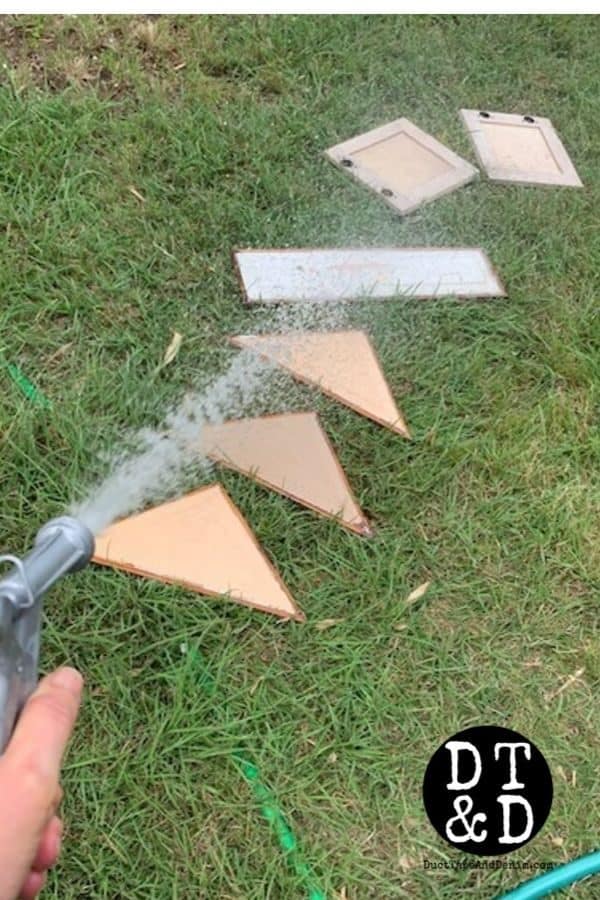
To clean them off, I took them all outside, scrubbed them with Dawn, and hosed them off with water.
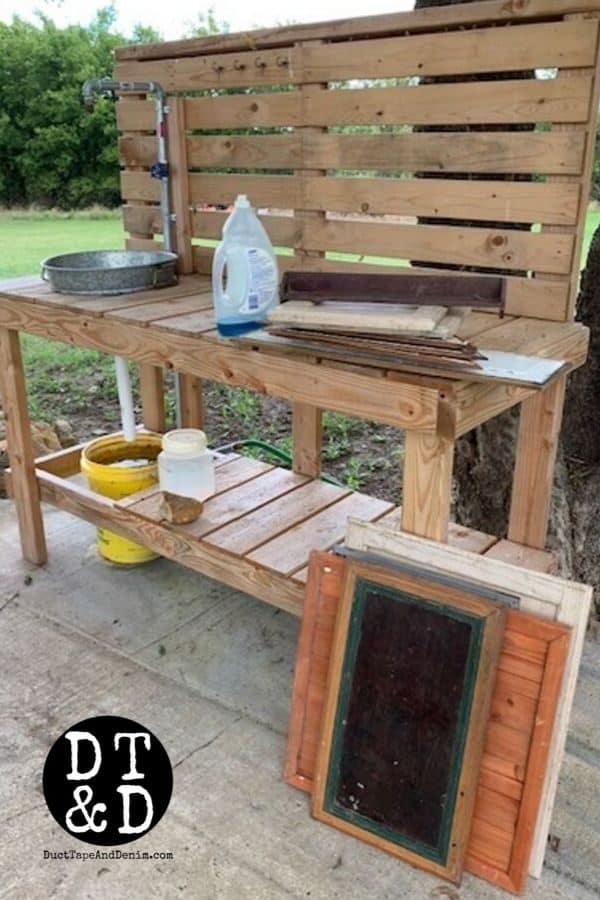
Here’s the pile of old kitchen cabinet doors at the outdoor sink that Bikeman built for me. I’ve used it a lot since moving to Texas!
To wash, I just spread the doors and door panels out over the grass and turned the hose on them.
Those triangle and long rectangle door panels came from a vendor from New Orleans. He had lots of doors, windows, and other pieces of architectural salvage. I like to dream about all the old houses they might have come out of!
Two: Spray Paint
Most of the time I use chalk paint for my projects but this week I had so many doors that I just lined them up and sprayed them. It took about three light coats for each sign.

Three: Apply the Stencil
Sometimes I use spray adhesive on my stencils. I would lightly cover the back with spray adhesive, wait five minutes, then apply the stencil to the sign.
But the stencils from Stencil Revolution are thicker than most (12 mil) and I don’t usually have a problem with them… as long as I offload (more about that in a minute).
So, this time I just used some washi tape to hold the stencil in place.
Four: Paint
As I’ve mentioned MANY times before… the most important thing when stenciling is to not use too much paint. I get a little on my brush and then offload it. That just means that I rub a little off on my paper plate, a paper towel, or on the side of the stencil.
Then either lightly pounce or brush in a circular motion. You can always come back and add more paint later. It’s harder to get it off if you put too much paint on it.
But even if you do get too much paint on your sign, you can usually fix it by sanding, painting over the edges with the background paint, or (as a last resort) paint over the whole sign and start again.
Here’s a video clip from when I made this on a Facebook Live. This one’s only a couple of minutes long. (And it will have a commercial in it. Please be patient… that’s one of the ways this blog pays for itself. Thanks!)
Five: Attach Hanger
I drilled holes in the back with my little Dremel and screwed in a couple of sawtooth hangers.
More Pumpkin Craft Ideas
If you enjoyed this pumpkin patch sign, you might also like these DIY ideas:
- Orange Jello Mold Pumpkins
- Vintage Jello Mold Pumpkins
- Decoupage Paper Mache Pumpkin
- 21 Easy Pumpkin Crafts You Can Make From Junk
- 25 Repurposed Junk Pumpkins
- How to Make a Pumpkin Farm Sign
- How to Make a Wooden Pumpkin Fall Sign
Thanks for reading! I’d love to hear about your experience with stenciling pumpkin patch signs. Leave me a comment and let me know if you try it!
‘Til the next project,
Linda at Mixed Kreations says
Love! Perfect for the holiday’s! I just repurposed my last large cabinet door. Need to find some more.
ducttapeanddenim says
I can’t wait to see what you come up with!
Denise Vagi says
What is a Dremel and what brand is it. Thanks a Bunch
ducttapeanddenim says
Dremel is the brand. It’s a small, lightweight tool that will drill, screw, file, etc. You can find it in just about every hardware store and Amazon.