Happy Spring! Easter is super early this year so we have to get on those Easter DIY projects! The one I’m sharing today could almost be a thrift store makeover since I bought these supplies on one of my thrifting trips. But the wooden eggs are easy to find or order new also. Keep reading to see how I made my easy galvanized wooden Easter eggs.
This post contains affiliate links. You won’t pay any more when you use these but I will earn a small commission on any purchases you make after clicking on them and I greatly appreciate it. Thanks for helping support my little blog!!!
{{{ Sign up for our email newsletter and get ALL my future projects sent straight to your inbox! }}}
Supplies for Galvanized Wooden Easter Eggs
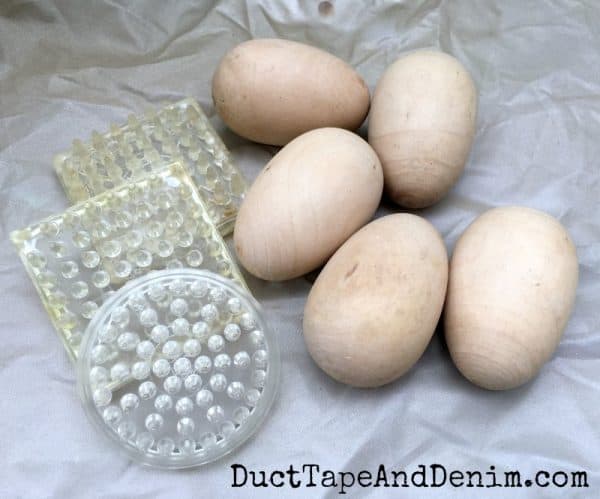
- wooden eggs
- Rustoleum Hammered Silver spray paint
- spray shelter — Optional, but extremely helpful.
- spiked furniture caster cups – Another optional tool.
How to Make Galvanized Easter Eggs
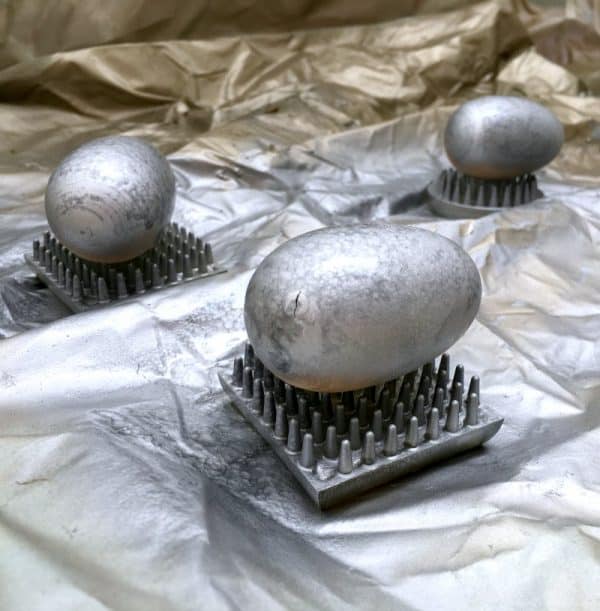
I had no idea what those plastic spikey things were when I bought a bag of them at my local thrift store. But since then I’ve learned that they’re spiked furniture caster cups, used to prevent crushing and wearing of carpet pile, as well as protecting hard floors from scratches and dents. Today they’re going to hold my wooden eggs so they don’t roll away while I spray paint them.
I spray-painted them in my spray shelter so I won’t get paint all over my patio. They each got two light coats of hammered silver spray paint. I sprayed one side, let it dry, turned it, sprayed the other side, and repeated.
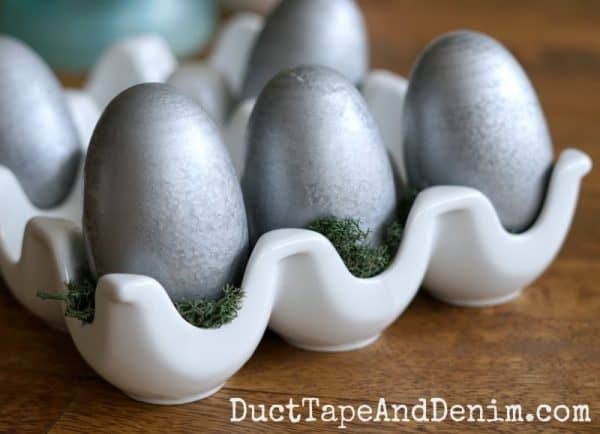
Finished Galvanized Easter Eggs
I love the result! When I posted a photo on Instagram I had friends actually think they were metal eggs!
These may or may not make it to Paris Flea Market…lol… (UPDATE: They didn’t! I’ve kept these and used them to decorate for 4 Easters!)
More Easter Crafts, DIY Projects, and Recipes
If you enjoyed this post, you might also like these:
- Cranberry Orange Ham Recipe – perfect for Easter!
- Easter Lamb Menu Chalkboard
- How to Make Easter Egg Bath Bombs
- Easter Egg Topiary
- Easy Easter Egg Mason Jars
I hope these inspire you to try painting some wooden eggs this year for Easter! Let me know if you do. I’d love to see how they turn out.
‘Til the next project,
Ann @ Duct Tape and Denim
Pinterest | Instagram | Facebook | Twitter | Etsy | YouTube
Originally published 3/29/17. Featured on Friday Favorites, Fun Easter Ideas


Stephanie Dolph says
Love how these came out! So chic and so simple! Thank you for sharing! Pinned!
Lucy Ravitch says
These look pretty neat : )
ducttapeanddenim says
Thanks!
Laurie says
These are very nice! Thanks for sharing with us at Snickerdoodle! Pinned to share.
Sue from Sizzling Towards 60 & Beyond says
a really different take on coloured easter eggs. Thanks for sharing with us at #OvertheMoon. I’ve pinned and shared.
Shirley Wood says
I love the Rust-oleum hammered spray paints. The results are always beautiful like on your eggs. So glad you shared this idea with us at Merry Monday.
Stephanie Dolph says
I would love to feature these in an Easter Round Up I am doing next week. Please let me know if that would be ok. I would include one picture and a link back to your site! Thanks
ducttapeanddenim says
Sure! One photo and a link back to the post is fine anytime. Thanks soooooo much for asking. And let me know when you post it and I’ll share it on social media, too.
Erlene says
Wow, who knew that wood eggs could look like metal and so easy too! Thanks for sharing on Merry Monday.
Celeste | The Whole Serving says
Pretty and elegant1 Thanks for sharing with our Pretty Pintastic Party.
Rachel Teodoro says
Just wanted you to know that I will be featuring this project on an Easter Egg round up as part of the create link inspire party. Thanks for linking up!
ducttapeanddenim says
Thanks for sharing! This is one of my favorite Easter projects and sooooooooo easy!
Sara @ Magical Mama Blog says
How easy and unique! Thanks for sharing on Sunday Features!
Lisa says
I love these galvanized eggs. I recently painted some wooden eggs myself and had a heck of a time getting them covered without smudging. Using the spikey furniture cushions was inspired. Thanks for the idea.
Mishele says
So simple to create, yet these eggs look amazing! Definitely pinning! Thanks for the inspiration!
By the way, visiting you from “Sincerely Paula” blog party! Happy weekend!
Angelina says
Great idea – the eggs look fab! Thanks for sharing with Thursday Favorite Things, we are so happy you joined us !
Claire says
Love the industrial/farmhouse look of these eggs. Great result.
Kathy A says
Great project! I don’t understand how the hammered effect happens but I have used several cans of it and it always turns out well! Loved the eggs.