I’ve been buying jewelry cabinets at thrift stores for YEARS. I used to pass on the jewelry boxes. They just weren’t interesting enough for me. And they didn’t sell well on my market trips. But one day I found one in great condition for only $1.00. I bought it. It sat in my craft room for a while, like most of my projects do. Then one day when I was stenciling a sign I thought, “Why don’t I stencil on the top of that plain, boring jewelry box?” After that, no jewelry box is safe around me! I’m painting them, stenciling them, decoupaging, or adding paper clay moldings to them!

Many of you who read my blog have asked questions about how I do certain things, where I buy jewelry boxes, how much I pay for them, where I sell them, how much I sell them for, and more. So I decided to try and put all that information in one place.
Even if you’re not in the repurposing business, I hope you’ll get a lot out of this information. Thrifting and repurposing is a lot of fun and you can create a beautiful DIY jewelry box for your home or as a gift for a friend or family member.
If you think of anything that I didn’t answer in this article or if you have more tips for me, PLEASE leave a comment and let me know. I hope this will be a source of information and inspiration for all you upcycling crafters out there!
This post contains affiliate links. You won’t pay any more when you use these but I will earn a small commission on any purchases you make after clicking on them and I greatly appreciate it. Thanks for helping support my little blog!!!

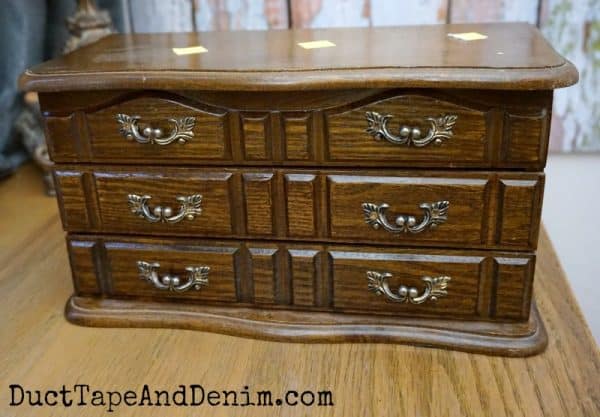
A typical jewelry box BEFORE painting and adding embellishments.
Where Can I Buy Jewelry Boxes to DIY?
This is a fun part for me. Finding vintage jewelry boxes to upcycle is a little like hunting. I find most of my jewelry boxes at Goodwill for $3.99-6.99. You can also find new wooden boxes at craft stores and online.
- thrift stores
- garage sales
- flea markets
- antique shops
- pop up shops
- craft stores
- Etsy
- Walnut Hollow
Here’s a few examples of jewelry cabinets that I found at thrift stores and shared on Facebook:
How Do You Paint a Jewelry Box?
What Kind of Paint Should I Use?
I only use chalk-type paints. Yes, they are a little more expensive than latex or craft paints but there are some advantages and I save time by using them. Chalk-type paints:
- Require little prep. Just clean the box well. No sanding is required.
- Have no smell. Which is great for me since I’m often painting on my dining table or in my craft room.
- Are easy to distress. After the paint dries it’s easy to rub it off with a damp cloth or a light sanding.
- Most must be sealed. If these paints aren’t sealed with a wax or other finish they will continue to wear off.
What Brand of Paint do You Recommend?
I do have a few brands that I use often but I haven’t found a lot of differences. Pretty much any brand of chalk-type paint will work well. Here’s what I have experience with:
- DecoArt Chalky Finish Paint – This is the one I use most often right now. I’m in their blogger program so they do provide me with most of the DecoArt paint that I use. But I also buy some of it from my local craft shop. Here are some examples:
- Paint & Paddles Chalk Paint – This is a small company in southern California. They were in the booth next to us at Junk Bonanza, San Diego and I traded some of the things I brought for paint.
- Fusion Mineral Paint – I received a sample of this when I went to the Snap Conference. I have one example on my blog:
- CeCe Caldwell’s Chalk and Mineral Paint – Paris Flea Market used to sell this so I could easily buy it when I went to work. This was the first chalk type paint I ever used. Examples:
- Homemade Chalk Paint – One of my fellow vendors at Antique Alley gave me her homemade chalk paint recipe. I don’t think it works quite as well as the storebought versions. But that could be because of “operator error”, too! It is cheaper and you can get an infinite variety of colors because you can turn ANY paint into chalk paint. Example:
What Product Do You Finish Your Jewelry Boxes With?
As I mentioned above, most of these paints need to be finished. All of the chalk-type paint companies sell (& most recommend) their own wax. I’ve tried wax and I don’t like it. If you do, go ahead and use it. Here’s what I use most often:
- DecoArt Soft-Touch Varnish – This brushes on easily.
- Minwax Polycrylic – This also brushes on. This is similar to the Soft-Touch varnish. I just use whichever one I have on hand.
- Minwax Express Color Stain and Finish – I use this when I want to add a little age or a more distressed look to the color.

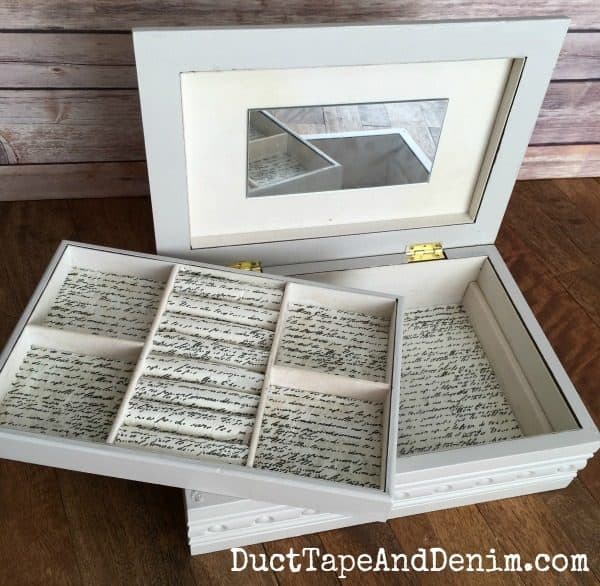
The inside of this mirror jewelry box was stained so I decoupaged tissue paper over it.
How Do You Decoupage a Wood Jewelry Box?
Decoupage is a great way to cover up stains on the inside or outside of an old jewelry box. Or just add a lot of color with scrapbook paper or fabric with no painting involved. Amy has some great tutorials on how to decoupage over on her blog.
What if the Inside is Stained?
As I mentioned at the beginning, I used to not buy old jewelry boxes at thrift stores at all. Then when I did start buying them I would check the inside to make sure it wasn’t stained. Not that I’ve learned how to decoupage, stains on the inside don’t bother me at all. Here are a few ideas to cover stains:
- tissue paper
- paint
- burlap
- fabric
What if it Has an Ugly Glass Lid?
If possible, I remove the ugly “faux stained glass” lid and replace with hardware cloth or a decorative metal sheet.
There are also several ways you can cover the glass.
- paint
- frosted glass paint
- burlap paper
- fabric
Examples of DIY Jewelry Box Projects
Painted Jewelry Box Makeovers
This is a great place to start. Pick a color you like and paint the whole box one color. Later you can choose 2-3 colors and layer or do other techniques to get different looks.
- Teal Box with Distressed Edges
- Light Blue Box with Glaze
- Jewelry Box Painted to Look Like a Vintage Card Catalog – uses crackle medium
Stenciled Jewelry Box Makeovers
This is the next step up after painting. Stenciling just requires a second color of paint, a stencil, and spray adhesive. Read one of these posts for a tutorial:
Decoupaged Jewelry Box Makeovers
If you’ve never decoupaged before, go read “Everything You Ever Wanted to Know About Mod Podge”. It goes into detail and explains how to decoupage without getting those pesky little bubbles!
And here are some examples of jewelry boxes that have been updated with decoupage:
- Pottery Barn Knock-Off with Quilling Strips
- How to Decoupage the Sides of Jewelry Box (or Cabinet) Drawers
- Decoupage Paper Inside Drawers
- Decoupage Tissue Paper Inside
- Decoupage Tissue Paper Over a Stain on Top
Other Embellished DIY Jewelry Box Makeovers
- Decorative Metal Sheet – My teal jewelry box.
- Fake Cake Jewelry Box with Silicone Caulk
- Paper Clay Moldings — (coming soon)
Jewelry Boxes Upcycled into Other Things
Jewelry boxes don’t always have to hold jewelry. Use your imagination and turn them into anything that will be helpful in your home. Here are a few ideas:
Other Things Upcycled INTO Jewelry Boxes
More imaginative ideas!
I hope this guide was helpful to you. Please leave a comment and let me know if you have other questions, comments, or suggestions. I’ll continue to update this as I learn more and find more examples to share.
Thanks for reading and don’t forget to sign up for my thrift store makeover email list and I’ll send all my new projects straight to you! We join these blog linky parties.
‘Til the next project,


