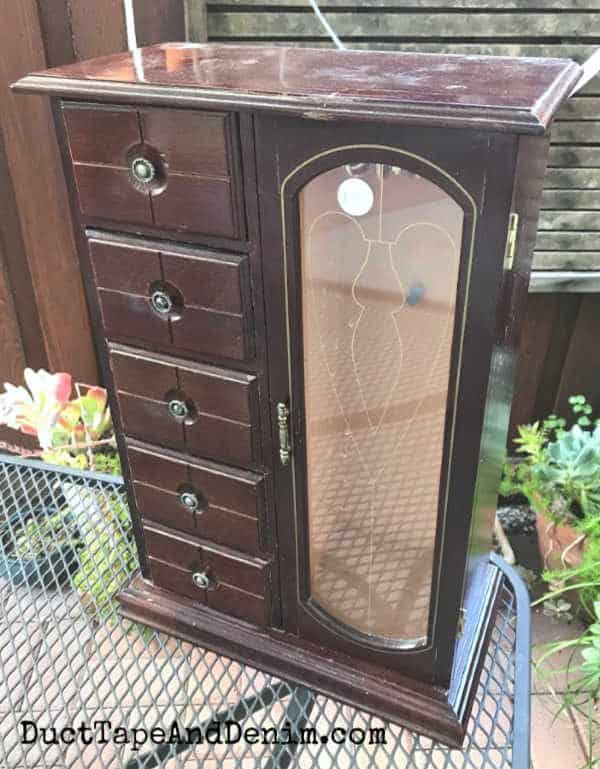
Welcome to our first jewelry cabinet makeover of the year!!! Today I’m sharing my first jewelry cabinet makeover with Dixie Belle Paint. I won some paint samples in one of my friend’s Facebook groups and I even got to pick the colors I wanted. So I picked Bunker Hill Blue, Holy Guacamole, and Chocolate. You’ll see the other colors in projects over the next few months.
Here’s what the jewelry cabinet looked like when I found it at the thrift store. I think I paid $6.00 for it… really need to start taking better notes. I took such a long break that I forgot exactly where I bought it and how much I paid for it.
This post contains affiliate links. You won’t pay any more when you use these but I will earn a small commission on any purchases you make after clicking on them and I greatly appreciate it. Thanks for helping support my little blog!!!
Sign up for our newsletter & get your own printable list of “25 Things You Should ALWAYS Buy at Thrift Stores” + all our upcycled projects sent straight to your inbox.
Supplies Needed for Jewelry Cabinet Makeover
- thrift store jewelry cabinet
- Dixie Belle Paint, Bunker Hill Blue
- Dixie Belle Paint, Caviar
- paintbrush – I ended up using 3 paintbrushes, including my favorite Zibra round brush.
- Dixie Belle Satin Clear Coat
- DecoArt Metallic Lustre, Gold Rush
{{{See a complete list of what’s in my toolbox and supply cabinet.}}}
Blending Black & Blue Dixie Belle Paint
This was my first experience with Dixie Belle Paint and let me just tell you… I love it! It’s so thick and smooth. And the available colors are beautiful. Plus the names are fun.
After removing the front glass (which was actually plastic) from my jewelry cabinet, I cleaned it with a spray cleaner and an old rag.
Then I gave it one coat of Bunker Blue.
As soon as it was covered with blue I came back and added the black around the edges. Then I started blending. Occasionally I added more blue to the center so it wouldn’t get too dark.
Helpful Hints:
- Pour some of each color into separate cups so the larger containers of paint don’t get contaminated with other colors.
- Use a different brush for each color AND an extra brush for blending. (See video.)
- If the paint dries out, spray it with water or add more paint. The water reactivates the previous layer.
This part took a little time but it was fun blending the colors.
Here’s a video if you’re a more visual learner:
Finished Blue Jewelry Cabinet Makeover
Here’s what the finished side looks like.
And don’t forget to paint the backs of your jewelry cabinets! I used the same technique on it.
Another Helpful Hint:
Practice a new technique on the back first to see how it turns out.
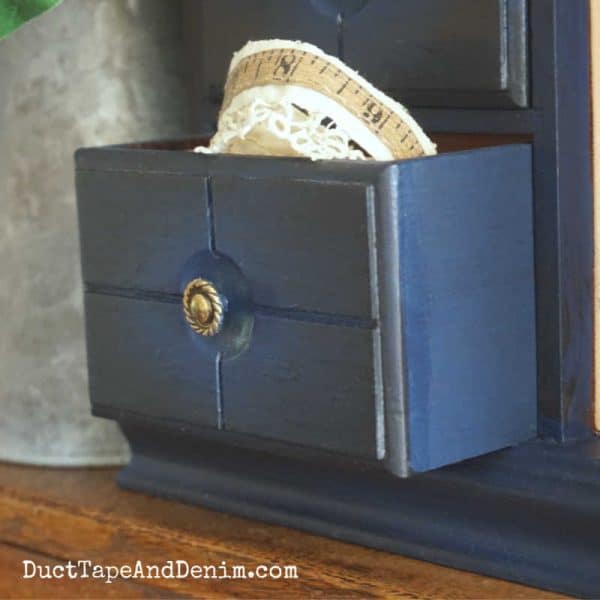
And here’s a close-up of one of the drawers. I used the gold Metallic Lustre on the knobs. And, no, I didn’t remove them before painting the drawers.
This was a tall jewelry cabinet! Tall enough to hang my 20″ necklaces.
More Thrift Store Makeovers
If you enjoyed this jewelry cabinet makeover, you might also like these:
- Green Jewelry Cabinet Makeover with Black Glaze
- Turquoise Boho Paint Finish on a Jewelry Cabinet
- DIY White Jewelry Box with Black Glaze
- Getting an Old World Layered Paint Finish on Furniture
- Buy Dixie Belle Paints online
Hope this project inspired you. Feel free to ask me questions about the paint or techniques I used. And sign up for my email list below to be notified when I post the other Dixie Belle Paint projects. (Holy Guacamole is coming up next!)
‘Til the next project,


Naomi S says
I love the way this jewelry chest turned out. I never would have thought to use the Caviar over the blue like you did. It looks great.
I have been collecting “vintage” jewelry boxes and chests with the intent of re-furbishing them but haven’t done one yet. I think I am a little intimidated by all the cool ones I see on-line! Guess I gotta get over that and just start on one. I have a whole Pinterest board of up-cycled jewelry chests for inspiration and I’ll certainly be looking at more of yours for inspiration. I’ve also been unsure of what paint to use but it sounds like Dixie Belle would be a good one to try.
Thanks for this “show and tell”, Ann!
Linda at Mixed Kreations says
Beautifully done! The first color was really blue but the technique with adding the black toned it down. Love how it turned out!
Kathy A says
Loved how it turned out. The bright blue made me wince–and I love bright colors! The highlighted knobs are pefect with it!