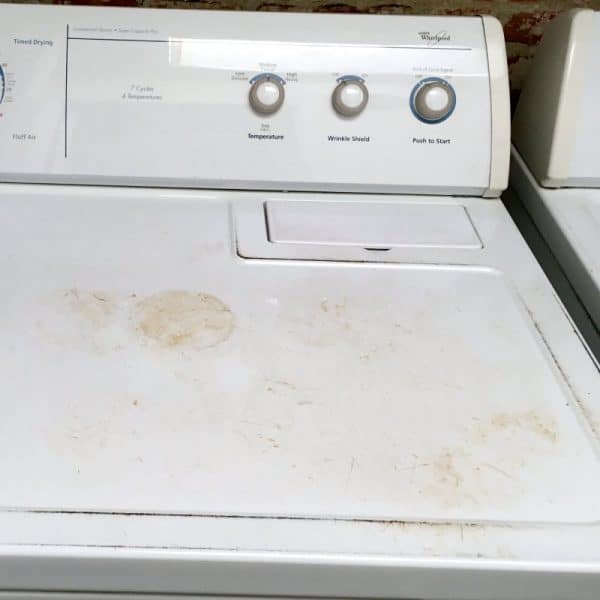
As I started cleaning up my small laundry room, aka “laundry closet”, for my $100 room makeover project, I realized how bad my dryer actually looked. Our washer and dryer are old, they came with the house and we’ve lived here for over 10 years. But they still work well so there’s no need to replace them. And a new washer and dryer are definitely NOT in my $100 budget!
I usually pile things on top of the dryer which has caused lots of scratches and rust spots on top. I’d never used appliance paint before so I thought I’d try it out on this project and today I’ll show you how to paint a washer and dryer. This project was really much easier than I expected!

This post contains affiliate links. You won’t pay any more when you use these but I will earn a small commission on any purchases you make after clicking on them and I greatly appreciate it. Thanks for helping support my little blog!!!
{{{ Sign up for our email newsletter and get ALL my future projects sent straight to your inbox! }}}
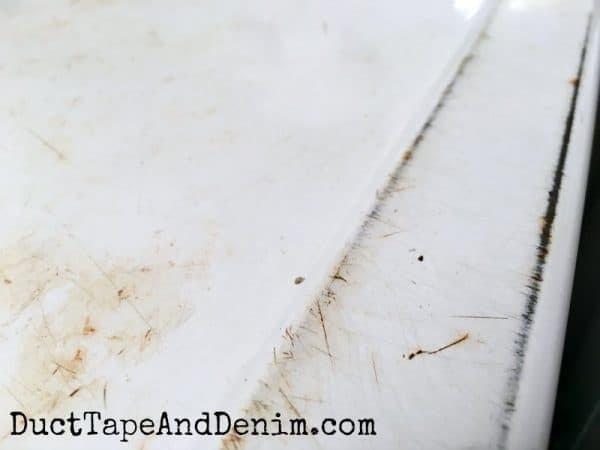
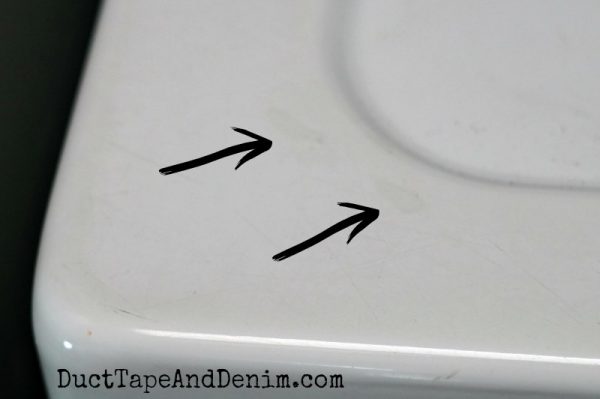
Here’s a close-up of the scratches and other small marks along the edges of the dryer. I guess the scratches came from thoughtlessly sitting my laundry basket and other items here. The washing machine didn’t look nearly as bad as this.
Supplies Needed to Paint Washer and Dryer
I wasn’t sure exactly what I needed so I ordered appliance spray paint AND appliance touch-up paint. The appliance spray paint does come in different colors so you could actually paint the whole washing machine and dryer if you wanted. I decided to stick with white appliance spray paint and I’m really glad I did.
Appliance epoxy paint is also available in a can like regular house paint and can be rolled on. This would be a much better option if you wanted to completely change the color of your washing machine and dryer.
Also needed:
- paintbrushes or rollers (if using paint from a can)
- mask (so you won’t be breathing in the nasty fumes)
- plenty of drop cloths or sheets if you have to do this indoors.
How to Use Appliance Paint
Prep Work
This project was actually much easier than I thought it would be. Most of my time was spent in prep. And let me warn you… unless you can pull your appliances outside MAKE SURE YOU COVER EVERYTHING IN THE AREA and WEAR PROTECTION ON YOUR FACE. My laundry room is upstairs and I was home by myself that day so I painted them where they were.
First, I removed everything from the areas I was going to paint and wiped down the washer and dryer with a damp cloth and paper towels. I even got out some Q-Tips and cleaned the tiny little nooks and crannies. My appliances were already looking better!
Then I hung some old sheets to protect the laundry closet walls and an old rug on the floor in front. I know from past experiences spray painting indoors that those little paint molecules settle ALL OVER THE ROOM.
How to Use Appliance Spray Paint
After that I just followed the instructions on the can of spray paint: Shake can for one minute before painting and shake often during painting. Hold can about 12″-16″ away from the appliance and spray with a back and forth motion. Always keep it moving. A second coat may be applied after 30 minutes.
The Finished Painted Appliances
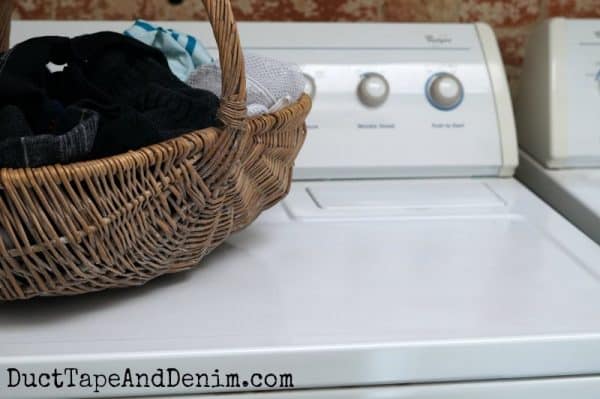
It took three light coats to get my dryer to look like this:
Quite a difference, right?
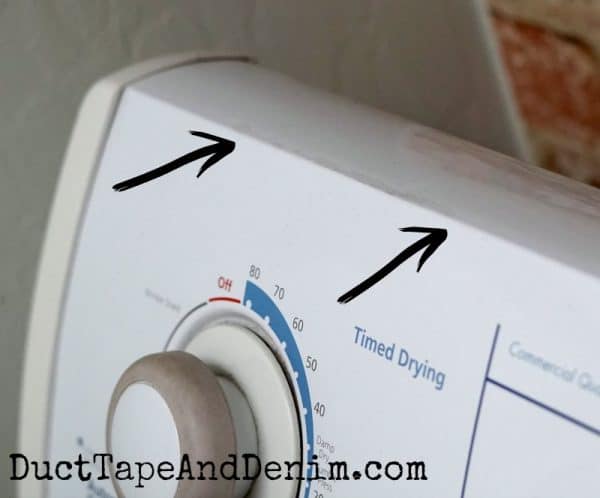
The appliance touch-up paint comes in a little bottle with a brush applicator. It looks exactly like an old bottle of “Wite-Out”. I used it on the top edge of the control panel where there was a scratch. Of course, I forgot to take a before photo on this one. In the photo below I pointed out exactly where the scratch was. If you look closely you can tell the area where I used the appliance touch-up paint looks different. But if you didn’t know, you probably wouldn’t even notice.
Here’s a little spot on the washing machine where I used the appliance touch-up paint. Again, slightly noticeable. I had more trouble covering the deeper scratches on the sides. But those didn’t bother me as much as the ones on the top.
Here’s a side by side so you can see the difference in my dryer. The little touch-up work did make a big difference. Wow! My husband actually thought I had bought a new dryer without telling him!
Where to Buy Appliance Paint
These might be at your local hardware store but since I have Amazon Prime I ordered from them and received my appliance paint in two days! Here are a few of the products I found on Amazon. I used the two Rustoleum products.
By the way, since I am so used to painting with chalk and mineral-type paints I’m always shocked by the smell and fumes from other paints. Beware! Make sure you have some good ventilation before you start painting your appliances!
Other Appliances That Can Be Painted
These same appliance paints can be used on other home appliances: refrigerators, dishwashers, stove hoods, and maybe even ovens. Although, I would probably switch over to a high heat paint for ovens and stovetops. I’ve never tried that. But I did paint my stove hood with spray paint.
Does Regular Latex Paint Work on Appliances?
I’ve been asked if regular latex paint could be used to paint appliances. The answer is, “Sure… if you don’t care what they look like.” Regular latex, acrylic, or chalk/mineral paints could be used. They just wouldn’t be as durable and might have to be touched up more often.
I have also seen people use self-adhesive vinyl wording on their appliances. That would be a great idea to switch up your laundry room decor or style, especially if you use removable vinyl.
More DIY Home Projects
If you enjoyed reading my experience with appliance paint, you might also like these:
- $100 Laundry Room Makeover
- 5 Gorgeous DIY Laundry Rooms
- DIY Dryer Rack
- Farmhouse Style Laundry Room
- DIY Laundry Pedestal
Thanks for reading! Leave a comment and let me know what you think about my paint job! BTW, we share at these blog parties.
‘Til the next project,
Ann @ Duct Tape and Denim
Pinterest | Instagram | Facebook | Twitter | Etsy | YouTube
Featured on 10+ Laundry Room Ideas. Originally published on March 22, 2017.


Cathy Kennedy says
I’m visiting this morning from “Inspire Me Monday”. I never thought about painting old appliances. What a good idea and WOW, what an improvement! Have a good day and I invite you to hit the dance floor with Curious as a Cathy with sci-fi theme mewsic from my favorite TV shows!
Tymekia says
So was the knobs and names on washer and dryer taped before spraying?
ducttapeanddenim says
I just threw a cloth over them. I didn’t paint the entire wash and dryer… only the scratched & rusty spots. But if you’re spraying a larger area definitely cover & tape them!
Nancy says
I didn’t know they had the spray paint. I knew they had little “touch-up” paint…but like yours, mine is scratched and a bit rusty in spots…it takes a beating. I don’t think I’d like to use spray paint….is there a brush on variety??
Nancy
wildoakdesigns.blogspot.com
ducttapeanddenim says
Nancy, I found this on Amazon (affiliate link) http://amzn.to/2nvIZis I haven’t used it but it’s the same brand I used. Rustoleum is a good brand.
Kathy says
I just painted my set! Mine was a mismatched, one almond, one white (eeeeek!) dryer scratched worse than yours! But, same as you, they both work great, so I painted them. I used Rustoleum appliance paint as well, only not the spray paint. Mine look like new as well! I love that stuff! I also did my range hood…it was in terrible shape…it looks like new, as well. Rustoleum makes a wonderful product! Thanks for posting, yours looks GREAT!
ducttapeanddenim says
Yay! I didn’t even think about buying a mismatched set. What a great solution! Did you brush on the paint or roll it? I’ll have to try that next. I’ve done my range hood, too. It was a hideous 1970s hood. It’s still not great but looks SO much better!
Linda says
Great idea. i am sure most people did not know about this. Thanks for sharing your experience at DI&DI.
Vanessa says
I am so impressed with how well the paint worked! My mom’s washer and dryer have both started rusting at the base, they may be too far gone for paint but I will definitely be watching mine so I can catch it early and fix it up now that I know you can.
Nora says
This does look great. I guess you only did the top and not the area around the knobs. Is that right? Perhaps if needed, that could be done with brush on. Thanks for sharing.
ducttapeanddenim says
Right. The area around the knobs didn’t have any scratches. You could use brush on for that.
CINDY RICHTER says
This looks great. Totally need to do this here at home. I have no clue how it got to be so scratched up! I found you on the Thrifty Thursday Link Party! So glad I did! Looking forward to future posts!
Theresa @DearCreatives says
Great idea for any appliance needing a spruce up.
Thanks for sharing at the Inspiration Spotlight party. Shared
Linda Haskell says
Great job!! I’ve sprayed my dryer with Rustoleum too with good results. I even got a light tan color and did the heat baseboard beside the toilet.
Roberta Fernandez says
Even though you say your washing machine was ten years old, I was surprised at the condition of your machine before you painted it. When the Sears technician comes to do an annual checkup, he always tells me that my machines look like new even if they are several years old. The tech says he sees a lot of machines that are newer than mine that are in awful condition. Why are people so careless? I always leave the top open after I use it in order to let the machine dry out. If people took care of their expensive appliances, they would not have to paint them or do touch-ups on them. But you did a good job improving the looks of your machine.
ducttapeanddenim says
Thanks, Roberta. Sorry I didn’t make myself more clear. We moved into this house about 10 years ago and the appliances came with the house. So I’m not really sure how old they are. I just know they’re older than 10 years.
Martha Jay says
I used Rustoleum on a rust spotted refrigerator I inherited with my house. I sanded it, followed the directions on the paint, but within 6 months the rust was back worse than ever!
ducttapeanddenim says
Oh, no! I’ll do a review about 6 months from now and let you know how my paint job is holding up.
Kari Rogers-Miller says
Thank you for the tips on spray painting appliances. And of course we thank you for sharing your link on Celebrate Your Story!
Kari@meandmycaptain
Delightful Repast says
Thanks for this info. My washer needs help! #PartyInYourPJs
Jann Olson says
It really turned out great! We’ve repainted a tub, but never an appliance. Thanks for sharing with SYC.
hugs,
Jann
Jennifer @ Decorated Chaos says
Wow. I never knew they had specific paint for appliances. Thanks for sharing! Your dryer looks great.
Sherry says
That looks really nice! Thanks for sharing at Home Sweet Home!
Great Value Handyman says
Just amazing! I love your commentary and every inch of the house! Amazing transformation and great style and charm. That looks really nice! Thanks for sharing at Home.