I’ve been waiting for this post for a long time! These frames have been collecting dust in my studio for a few months now waiting to be made into DIY jewelry display! In fact, I have a whole wall of frames in different stages of being made over.

DecoArt supplied me with the products for this project but the ideas and opinions are my own. This post also contains affiliate links. You won’t pay any more when you use these but I will earn a small commission on any purchases you make after clicking on them and I greatly appreciate it. Thanks for helping support my little blog!!!
DIY Jewelry Display
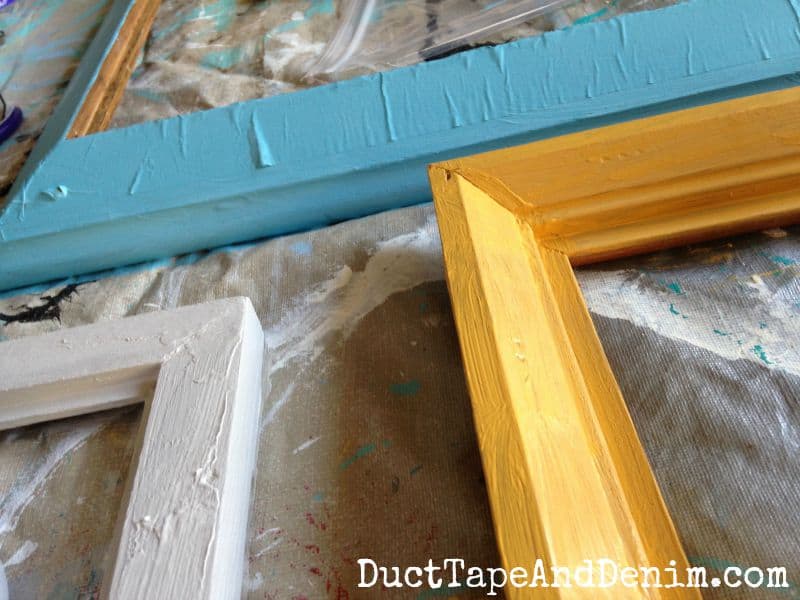
Here we are, ready to paint! A few important things to notice… 1.) I’m painting on my dining table so it’s covered with my trusty old vinyl tablecloth that I only use for painting. You can see all my favorite colors there! My hubby says it looks like a sheep murder scene! (The sheep will show up on the blog soon.); and 2.) I paint with a cup of coffee. Although you may want to drink the coffee BEFORE you paint. I almost dipped my brush in the coffee at one point…lol…

Supply List for My DIY Jewelry Display Frames:
- Americana Decor Chalky Finish Paint in Primitive (gray), Inheritance (gold), Escape (blue), and Carbon (black used for staining)
- DecoArt One Step Crackle
- Americana Acrylic Paint in Burnt Umber
- Americana Decor Light Satin Varnish
- paintbrush (I like the angle flat paint brush!)
- chicken wire
- metal sheet
- metal ribbon
- staple gun & staples
- needlenose pliers
- gloves (not necessary, but nice when you’re working with the metal)
I started by painting the backs. As you can see, I didn’t sand or even remove all the old paper off of them.
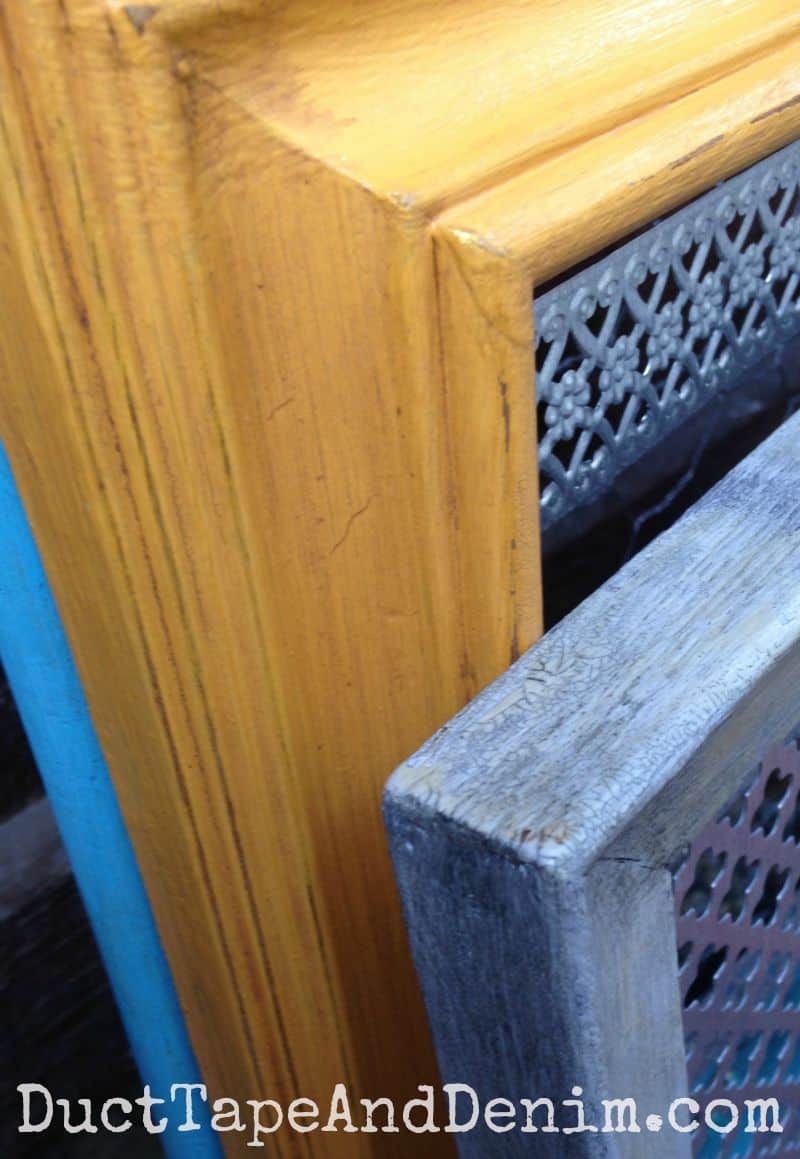
I also tried something new on these, the DecoArt One Step Crackle. I had heard how easy it was and couldn’t wait to try it out. So here are the steps:
- Paint: No sanding or other prep needed (unless you have a stain that needs to be covered). 1-2 coats depending on the color. I did one coat on the blue and grey and two coats on the gold. Let dry completely.
- One Step Crackle: Just brush it on and let dry. (NOTE: I was a little concerned when I didn’t see crackling but after I antiqued it they appeared.)
- Antique: I used Carbon (black) for the gray frame and Burnt Umber for the other two. I thinned the paint, brushed it on, let it settle into the cracks, then wiped it off with a rag, and let dry.
- Varnish: A thin coat applied after everything is dry.
It didn’t turn out like I thought it would. It turned out much better! The times before that I’ve used crackle mediums I got big, chunky cracks. Which are fine sometimes. But this turned out tiny, hairline crackles. Doesn’t the grey one, especially, look like it’s really old?
I also decided to finish each of these in a different way. You can see how they were attached below.
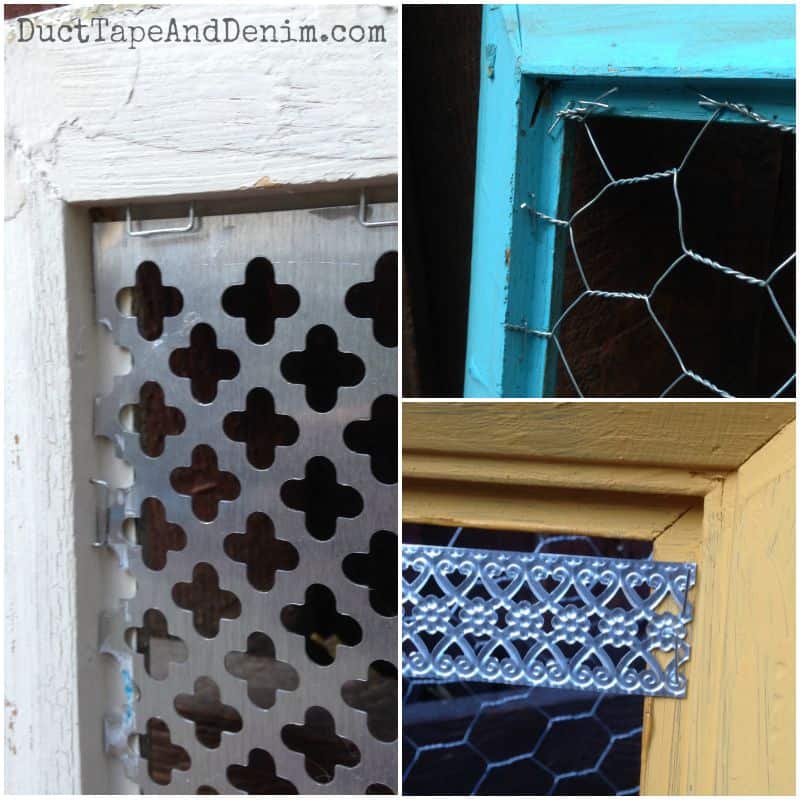
The chicken wire on the blue frame is how I’ve been finishing frames for years. One little trick to use with that is to wrap the ends of the wire around the staples. Both to keep it from slipping out and to keep it from scratching the wall (or your hand).
I’ve also used these metal sheets in a lot of the jewelry cabinet makeovers. They come in several patterns. Notice I angled the staples into the side instead of straight through the frame? This frame was very thin at that point and the staples would have gone all the way through.
The metal “ribbon” came from Hobby Lobby. It was leftover from all our DIY wedding crafts from last year. I just measured across, cut it with tin snips, marked equal distances on either side of the frame, and stapled them in. Now I have three styles of jewelry display frames!
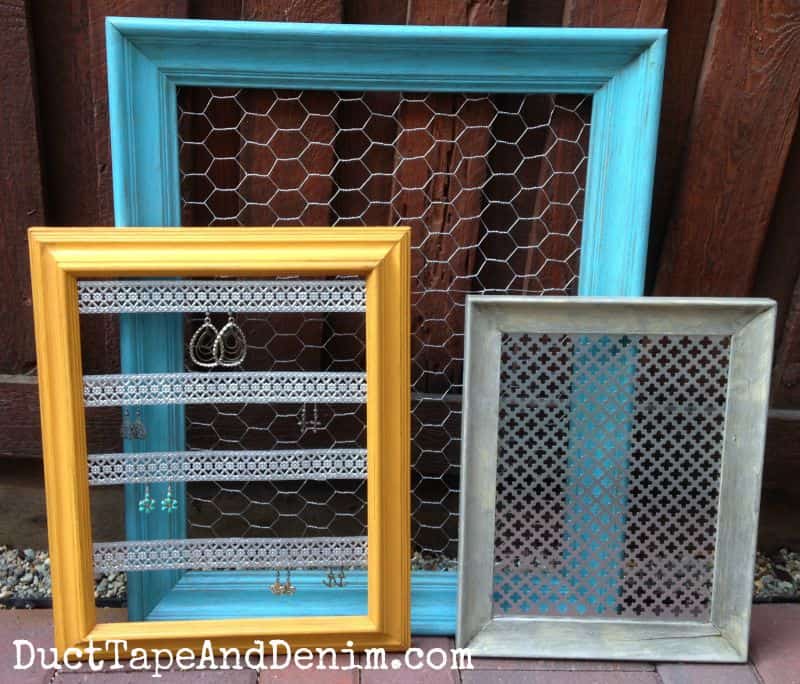
Leave a comment and let me know which color jewelry display you like best!
‘Til the next project,
Ann @ Duct Tape and Denim
Pinterest | Instagram | Facebook | Twitter | Etsy | YouTube
Originally published on August 26, 2015. Sharing at these blog parties. Featured on the Clever Chicks Blog Hop, Anything Blue Friday #100 on the Dedicated House, Inspire Me Monday, Crafty Weekends

Angela says
These turned out great! I love the one with the metal plus sign design. All three paint jobs look awesome!
ducttapeanddenim says
Thanks!
Judith says
Love this idea and can’t wait to make one for my earrings.
ducttapeanddenim says
Thanks, Judith! I’d love to see it.
janet Trieschman says
I love the textures you got on those frames!
ducttapeanddenim says
Thanks, Janet!
Jess says
This is such a neat idea! LOVE it! 🙂
Thanks for joining Cooking and Crafting with J & J!
Carole West @ Garden Up Green says
Neat idea – I like this would also make a great handmade gift for a friend.
ducttapeanddenim says
Thanks, Carole!
Kathryn Griffin @TheDedicatedHouse says
Such great makeovers! Thank you for sharing. You are one of the features at the Anything Blue Friday party at The Dedicated House. Here is the link to this week’s party. http://www.thededicatedhouse.com/2015/10/anything-blue-friday-week-100.html Hope to see you again at the little, blue soiree. Toodles, Kathryn @TheDedicatedHouse
ducttapeanddenim says
Thanks, Kathryn!
Deborah W. says
I love the blue color but love the earring strips and the mess backing the best. Such great ideas; can’t wait to try this!
Grammy Dee from Grammy's Grid says
These look very nice, I really like them! So glad to “meet” another blogging grandmother 🙂 Thank you Ann for linking up at the #BloggingGrandmothersLinkParty. I shared this post.
Sue from Sizzling Towards 60 & Beyond says
Oh these frames look great! Thanks for sharing your idea with us at #BloggingGrandmothersLinkParty.
Donna says
This is such a creative, attractive and practical idea. Thanks for sharing this at #BloggingGrandmothersLinkParty!
Fiona Cambouropoulos says
What a clever and original idea. I love this #CreativeMondays
Jessica @ The Junk Nest says
I love these frames. So easy and yet so cute!
Charlene says
I need to make one of these so bad. That way my jewelry stays in one place.
wendy robbins says
This is a cute idea… you’ve done a great job!
Clearissa Coward says
Oh wow!! I love them. Happy to meet a fellow crafty blogging grandmother. Welcome. Thank you for linking up at the #BloggingGrandmothersLinkParty.
Lori Hill-Smith says
What a fun and pretty idea! So creative! Thank you for sharing at #BloggingGrandmothersLinkParty.
Angela says
I’ve se n this before and always wanted to do it! I love your colors and th ribbon metal. Your jewelry display frames turned out so great!
Jenny@CookiesCoffeeandCrafts says
I need to go to more thrift stores for frames. Great idea!
Carol ("Mimi") says
Great tutorial for this project!! Thank you for linking up at #BloggingGrandmothersLinkParty. I’m sharing your link on social media.
Carol (“Mimi”) from Home with Mimi
Teresa says
I’m constantly amazed at all of the creativity I see. These are so pretty, it’s hard to choose, but I think I’m going to go with the gray! Thank you for linking up with us at the #BloggingGrandmothersLinkParty!
Cathy says
My jewelry is a disorganized mess! I need to do something like this – looks great!
Donna @ Modern on Monticello says
I need at least one of these in my house so I can find my earrings. Great project. Thanks for sharing at #HomeMattersParty
Catherine says
I love your site, and your projects are exactly what I want to do for myself. Thank you!
Kathy A says
I have to get over my fear of fighting with chicken wire and try a few of these! I know I will end up looking like I lost the cat fight even with gloves! Love the antiquey looking finish. Crackle is another thing I need to try-you do make it look easy!
Melinda Belville says
Just a suggestion. Please use BLACK instead of grey for font color. Much easier to see and read for those of us with less than perfect vision. I wish ALL sights would take that into consideration. Thank you.
Lisa says
if I did, I’d do exactly what you have done. They are so fun and such a great pop of color against the white walls. And if you get bored, you can just rip it off and start over! Visiting from Redo It Yourself Inspiration party.
Laura M says
This is EXACTLY what I am looking for. Where did you get the metal sheets? Excited to get started I. This project-its been a long time coming!
ducttapeanddenim says
I bought them on Amazon: https://amzn.to/2Yho0Ds
Have fun with your project.
ducttapeanddenim says
I got it on Amazon: https://amzn.to/2Yho0Ds
Have fun with your project!